
Create these DIY beeswax numbers to make learning fun! This project is simple, beautiful, and most importantly non-toxic. Add in some herbs for a creative touch or leave them plain. The possibilities are endless!
I wanted to come up with a cute DIY number toy for my little ones. This came to mind after I created my beeswax letters. I love that there are so many ways to play with these and I can rest easy knowing they're non-toxic, unlike many other options for this style of toy I've seen online.
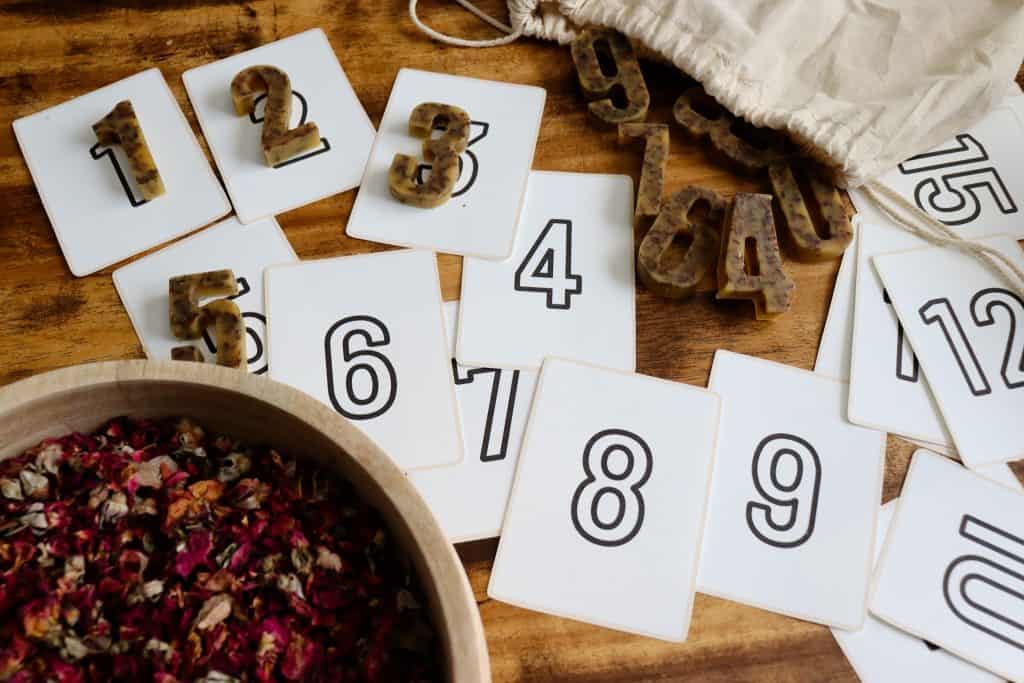
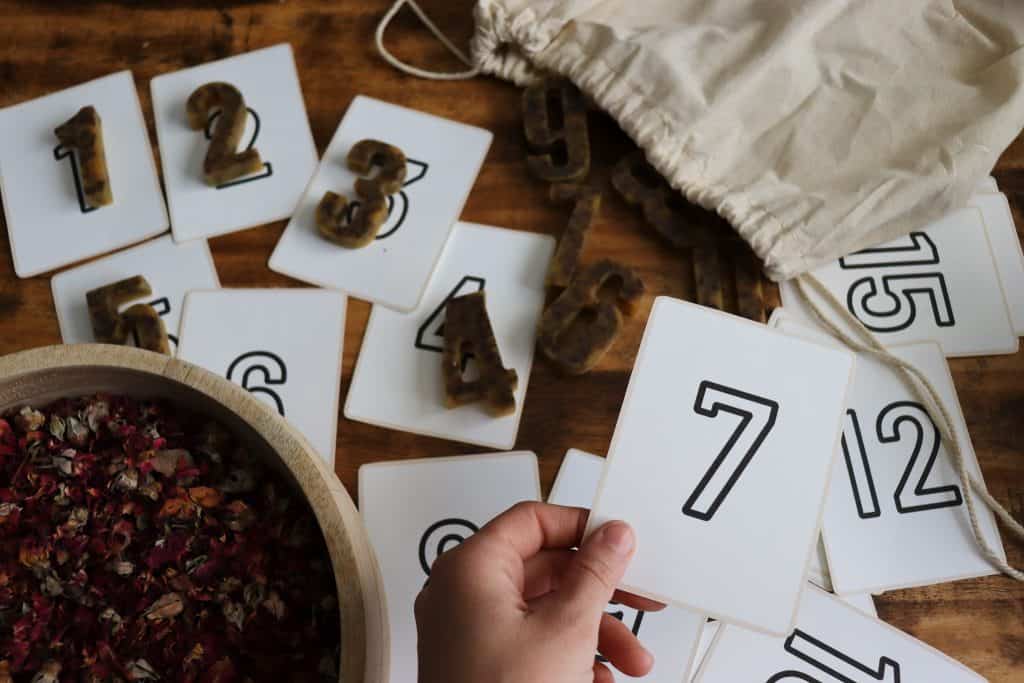
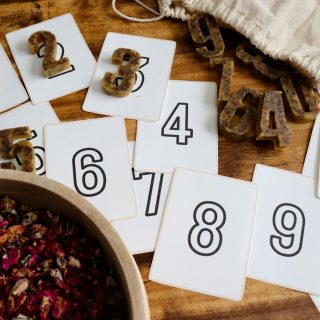
Using flashcards alongside these numbers makes learning feel like play. Everything from identifying and matching numbers to math concepts can be taught with this set! I struggled with math all throughout my school days so I'm always trying to figure out the best ways to teach my children so they don't face the same struggles I did.
This Post May Contain Affiliate Links. Please Read Our Disclosure Policy.
Add dried herbs such as lavender or rose petals to make them even more special!

Fun uses for your herbal beeswax numbers!
Here are some activities you can do with your homemade number toys.
- Number matching - Use flashcards to match with your beeswax numbers! It's a fun way to learn through play.
- Learning numbers for kindergarten - Point together as you count to help your child learn how to identify each written number.
- Counting activity - Layout groups of small objects (ex: dry beans) and have your little learner(s) count them. When they identify how many are in each group, have them place the beeswax number next to the pile.
- Backward counting - Line up your numbers and point at each number together as you count down backward.
- Diy math activity - Use these DIY number toys to make math fun! Use them to create addition, subtraction, or even multiplication problems to solve.
- Counting by twos - Layout 2, 4, 6, 8, and 10. Your child will be counting by 2s while pointing and identifying each number! Once they learn this they will be able to pull them out and show you the even numbers!
- Correct the order - Lay the numbers out in a line in the incorrect order. Have your child fix them!
- Evens VS odds - Have your child sort two groups: evens and odds!
How to use beeswax bars
Use a knife and cutting board to chop your beeswax bars into small pieces that will fit in your mold. The beeswax bars are smaller and thinner than the big blocks some apiaries have and are easier to cut through and work with! I used a block of beeswax when I made my herbal beeswax letters be sure to check that out to see the difference.
When sourcing for local materials, call ahead and ask about their beeswax! They will be able to let you know if they have blocks or bars available. You can also use beeswax pellets (sometimes also called beeswax pastilles) that are available online if that is more accessible to you. Support local businesses if you can!
For this project, the safest way to melt and use your beeswax will be using the oven. The silicone mold is oven safe. This way you're not worried about getting burned while trying to pour hot wax into each number in the mold.
Join in the fun over on Instagram!
Tag Tulipsandtwill when you post a photo of your DIY Beeswax numbers, I can't wait to see! Use the hashtag #tulipsandtwill so others can see your completed project too!
What you need for this beeswax craft
- Silicone number mold.
- Beeswax.
- Dried herb of choice (rose.)
- Knife (if using a block of beeswax.)
- Baking sheet.
- Optional: parchment paper.

How to make herbal beeswax numbers
- Preheat your oven to 300°F.
- Cut your parchment paper to fit the bottom of your baking sheet. Place the mold on it.
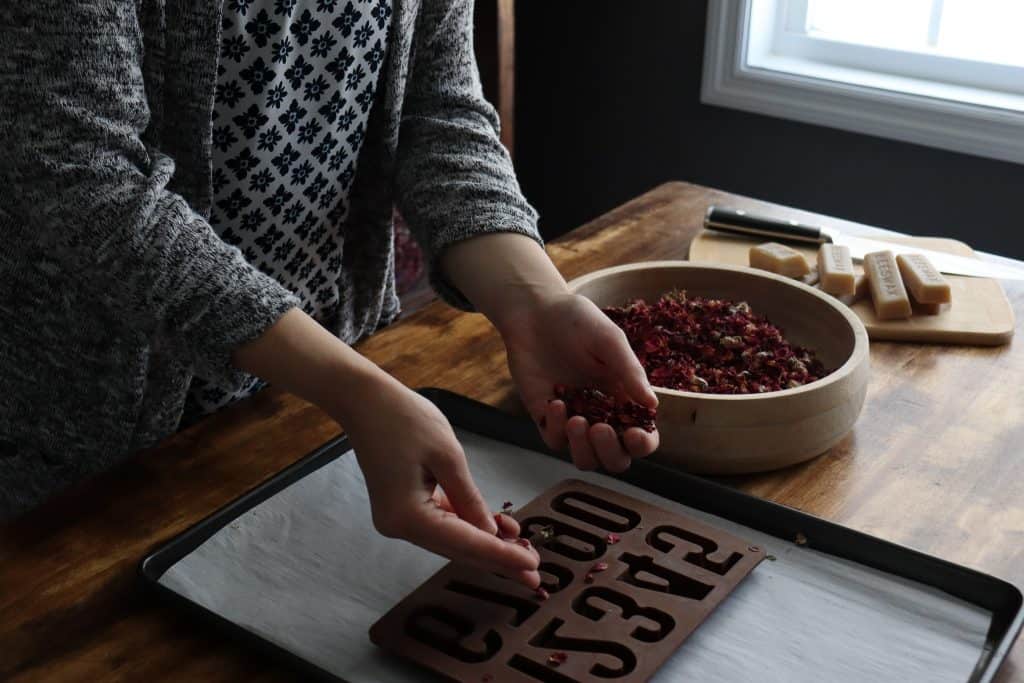
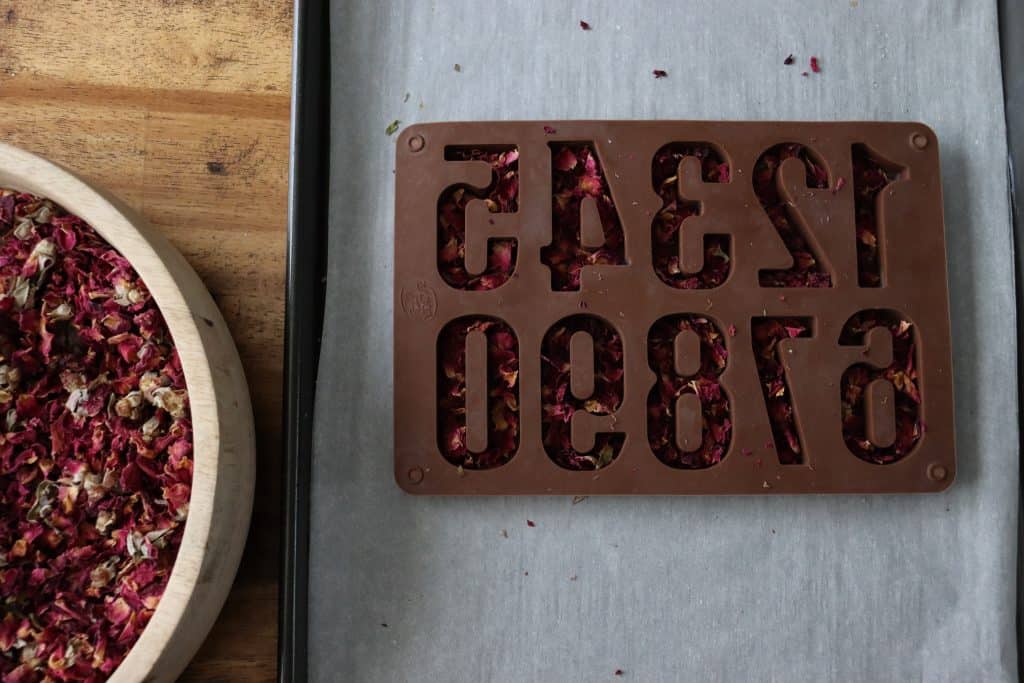
- Take small amounts of dried rose petals. Make a single layer in the bottom of each number.
4. Chop your beeswax block into small pieces that will fit into the mold and overfill each number. (It will melt down so you want to be sure it’s filled up!!)


5. Pop it in the oven and set a timer for 20 minutes.
6. Now the beeswax is completely melted. Carefully remove from the oven and set aside to cool and harden overnight.
7. If your numbers aren't thick enough due to not fitting enough beeswax in (ex: using rose or another bulkier herb) you may need to add in more beeswax and repeat the melting and setting process again!
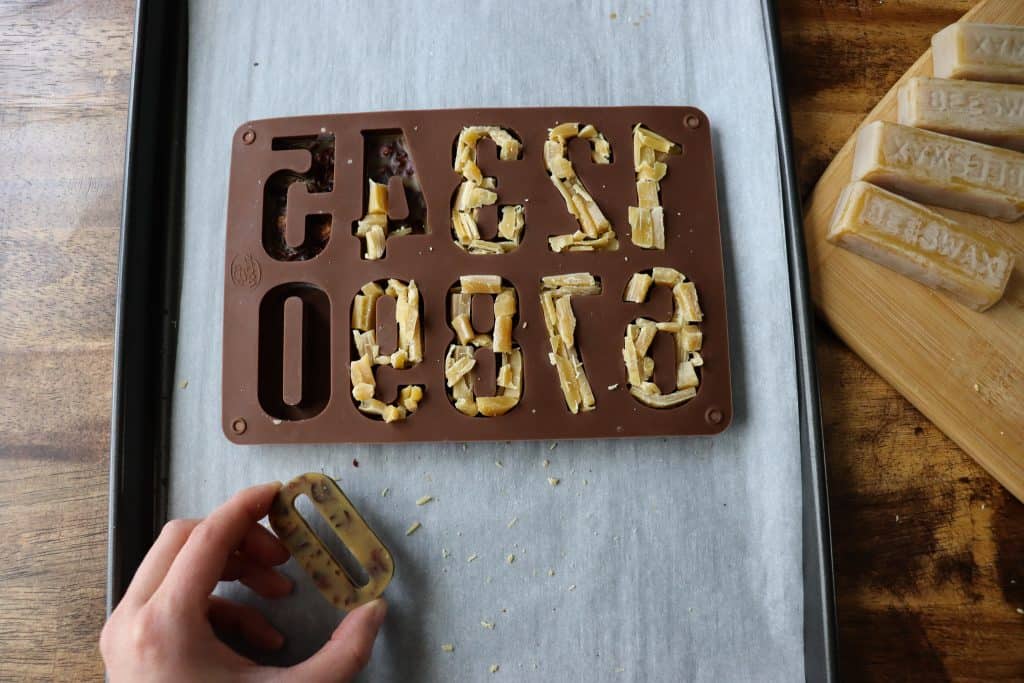
8. Carefully remove each number from the mold. Move the sides a bit to gently pull the edges away from the wax to make it easier. Slow and steady so you don’t crack them! Have fun playing with your herbal beeswax numbers!

Tips and tricks
- Be sure to fill your number mold to the very top of each number with beeswax as it will melt down. You don’t want them to be too thin and breakable.
- If any melted beeswax ends up on the edges of your mold, the parchment paper, or even the baking sheet be sure to scrape it off and save it for future use! (Zero waste!)
- Allow your numbers to cool for at least 3 hours. If you are questioning if they are fully solid, let them rest overnight to be safe.
- If your numbers aren't thick enough due to not fitting enough beeswax in (ex: using rose or another bulkier herb) you may need to add in more beeswax and repeat the melting and setting process again!
- Gently tug the sides of the mold around each number before removing them to ensure nothing is sticking too tightly.
- Be patient and work slowly as you take your numbers out of the mold to avoid cracking.
- Do NOT add dried herbs if you plan to use these as wax melts. Leave the numbers plain so that they don’t burn in your wax warmer.
- Always supervise young children with these as they could bite part of them off and create a choking hazard.

You may also like...
- DIY Beeswax Letters
- Dandelion Infused Honey
- How to Press Flowers in a Book
- Homemade Calendula Salve
- DIY Unscented Soy Candles
Will you add dried herbs to your beeswax numbers?
Leave a comment and let us know!
DIY Beeswax Numbers
Equipment
- Silicone number mold
- Knife. if using a block of beeswax
- Baking sheet.
- Optional: parchment paper
Ingredients
- Beeswax
Instructions
- Preheat your oven to 300°F.
- Cut your parchment paper to fit the bottom of your baking sheet. Place the mold on it.
- Take small amounts of dried rose petals. Make a single layer in the bottom of each number.
- Chop your beeswax block into small pieces that will fit into the mold and overfill each number. (It will melt down so you want to be sure it’s filled up!!)
- Pop it in the oven and set a timer for 20 minutes.
- Now the beeswax is completely melted. Carefully remove from the oven and set aside to cool and harden overnight.
- If your numbers aren't thick enough due to not fitting enough beeswax in (ex: using rose or another bulkier herb) you may need to add in more beeswax and repeat the melting and setting process again!
- Carefully remove each number from the mold. Move the sides a bit to gently pull the edges away from the wax to make it easier. Slow and steady so you don’t crack them! Have fun playing with your herbal beeswax numbers!


tulipsandtwill
Christen,
Thank you so much! I love lavender too!
-Mariana
Christen
I love that you added in herbs for a beautiful but fragrant way to play! I'd love to try this with lavender! I especially love all the ideas of ways to use the beeswax number. Such an amazing DIY project!
Julie
These beeswax numbers are adorable (along with the letters!) Such a fun craft project that can be used for years to come. Excited to try out the mold I've never made anything like them before!
Felicia
These are so cute!! You have the most adorable crafts.
tulipsandtwill
Emily,
It is so fun! Thank you so much!
-Mariana
tulipsandtwill
Sheri,
Yes! Include those little helpers! Thank you so much.
-Mariana
tulipsandtwill
Jenny,
Thank you so much!
-Mariana
Jenny
Yet another awesome fun, eco-friendly craft idea - oh, and it's educational, too! So glad you keep sharing your great crafts.
Emily
This project looks fun! Such a creative idea!
Sheri
Cute project! This would even be a fun project to make with the kids. They could help with filling the mold with herbs and beeswax cuts. Thanks for posting!
tulipsandtwill
Erin,
Thank you so much! I hope you give this project a try.
-Mariana
tulipsandtwill
Julie,
Thank you so much! I love having the letters and numbers for my little ones to play with.
-Mariana
Julie
Still the cutest things I've ever seen! And I love that they're made with kid friendly bees wax and natural products. ?? Thanks!;
Erin
This looks like such a fun project to try! This is so creative and I love adding different herbs to the numbers.