
How to make dried orange slice ornaments for decoration and to use on gifts! Add that old-fashioned Christmas feel to your home and to the presents you wrap up for loved ones!
Handmade ornaments add that old-world feel to your home this time of year. That touch of childhood whimsy and those feelings of nostalgia are what I know I'm craving during Christmas time! Orange slice ornaments are one of those little details that help to cultivate the coziness you're striving for as well!
Keep it simple or add other special little elements, they're lovely either way! The process is so simple. First, you need to dry your orange slices in the oven. Then after they cool and sit overnight to help any lingering dampness dry up, you can get creating. Make a dried orange garland along with your orange slice ornaments to carry this look throughout different parts of your home.
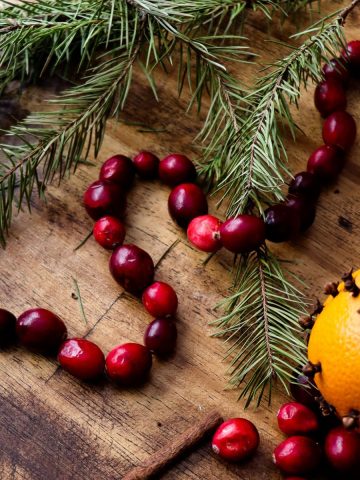
To add to the natural, handmade, and old fashioned feel of these ornaments, string up a cranberry garland or popcorn garland for your tree this year as well! It's the perfect project to work on at night by the fire.

This Post May Contain Affiliate Links. Please Read Our Disclosure Policy.
Jump to:
Why you'll love this DIY!
- Cozy - The lovely touch of handmade Christmas decor in your home is so cozy! Little old-world style touches like these are so homey.
- Unique - You can make these in so many fun and creative ways!
- Family Project - Making orange slice ornaments is a fun project to do with the whole family. It will truly become a family tradition and cherished memory.
- Minimal waste - Create your orange slice ornaments and properly store them to ensure they last for a few years! Then you can compost them to keep it eco-friendly! Opt to only use natural materials if you so choose!

Customize yours
Make your orange Christmas decor beautiful and unique by adding other elements to them!
- Cinnamon sticks
- Star anise
- Cloves
- Bells
- Rosemary
- Ribbons
- Wooden beads
- Popcorn
- Cranberries
- Bay leaves
- Small bits of pine branches
How to hang your orange Christmas ornaments
You need to decide how you want to string your ornaments so you know how they will hang!
- Flat - Keeping the full circle flat to show the face of the orange is a lovely way to hang them.
- Stacked - Create a stack by running the ribbon or twine through the center of each orange and tie a knot or place a wooden bead between each to make them hang sideways in a stack.

Use them on gifts
Do you ever see perfectly wrapped gifts with beautiful touches? Add your own twist to accomplish that look this year! Here are some tips and how to incorporate your orange slice ornaments into the look:
- Gift wrap - Use brown gift wrap or any classic-looking wrapping paper! Stripes, polka dots, whimsical prints, or even solid colors like red, green, white, or matte black will all look lovely in their own way!
- Twine - Butcher twine, jute cord, or ribbon will work perfectly depending on how you want the overall look of your gift to be.
- Gift tag - Use a gift tag to add on top of your dried orange slice ornament. The layered look is lovely and creates an old-fashioned and oh-so-special look to your gift! Drop your email in the box below to get your FREE printable gift tags sent right to your inbox and to subscribe.
They can last for 2-3 years or more! Store in an airtight container to enjoy next year. Optional: seal your dried orange slice ornaments with Mod Podge to help preserve them.
What you need
- Dried orange slices
- Twine, butcher twine, ribbon, etc
- Optional: other decorative elements (see notes!)
- Optional: hot glue gun
- Optional: Mod Podge

How to make orange slice ornaments
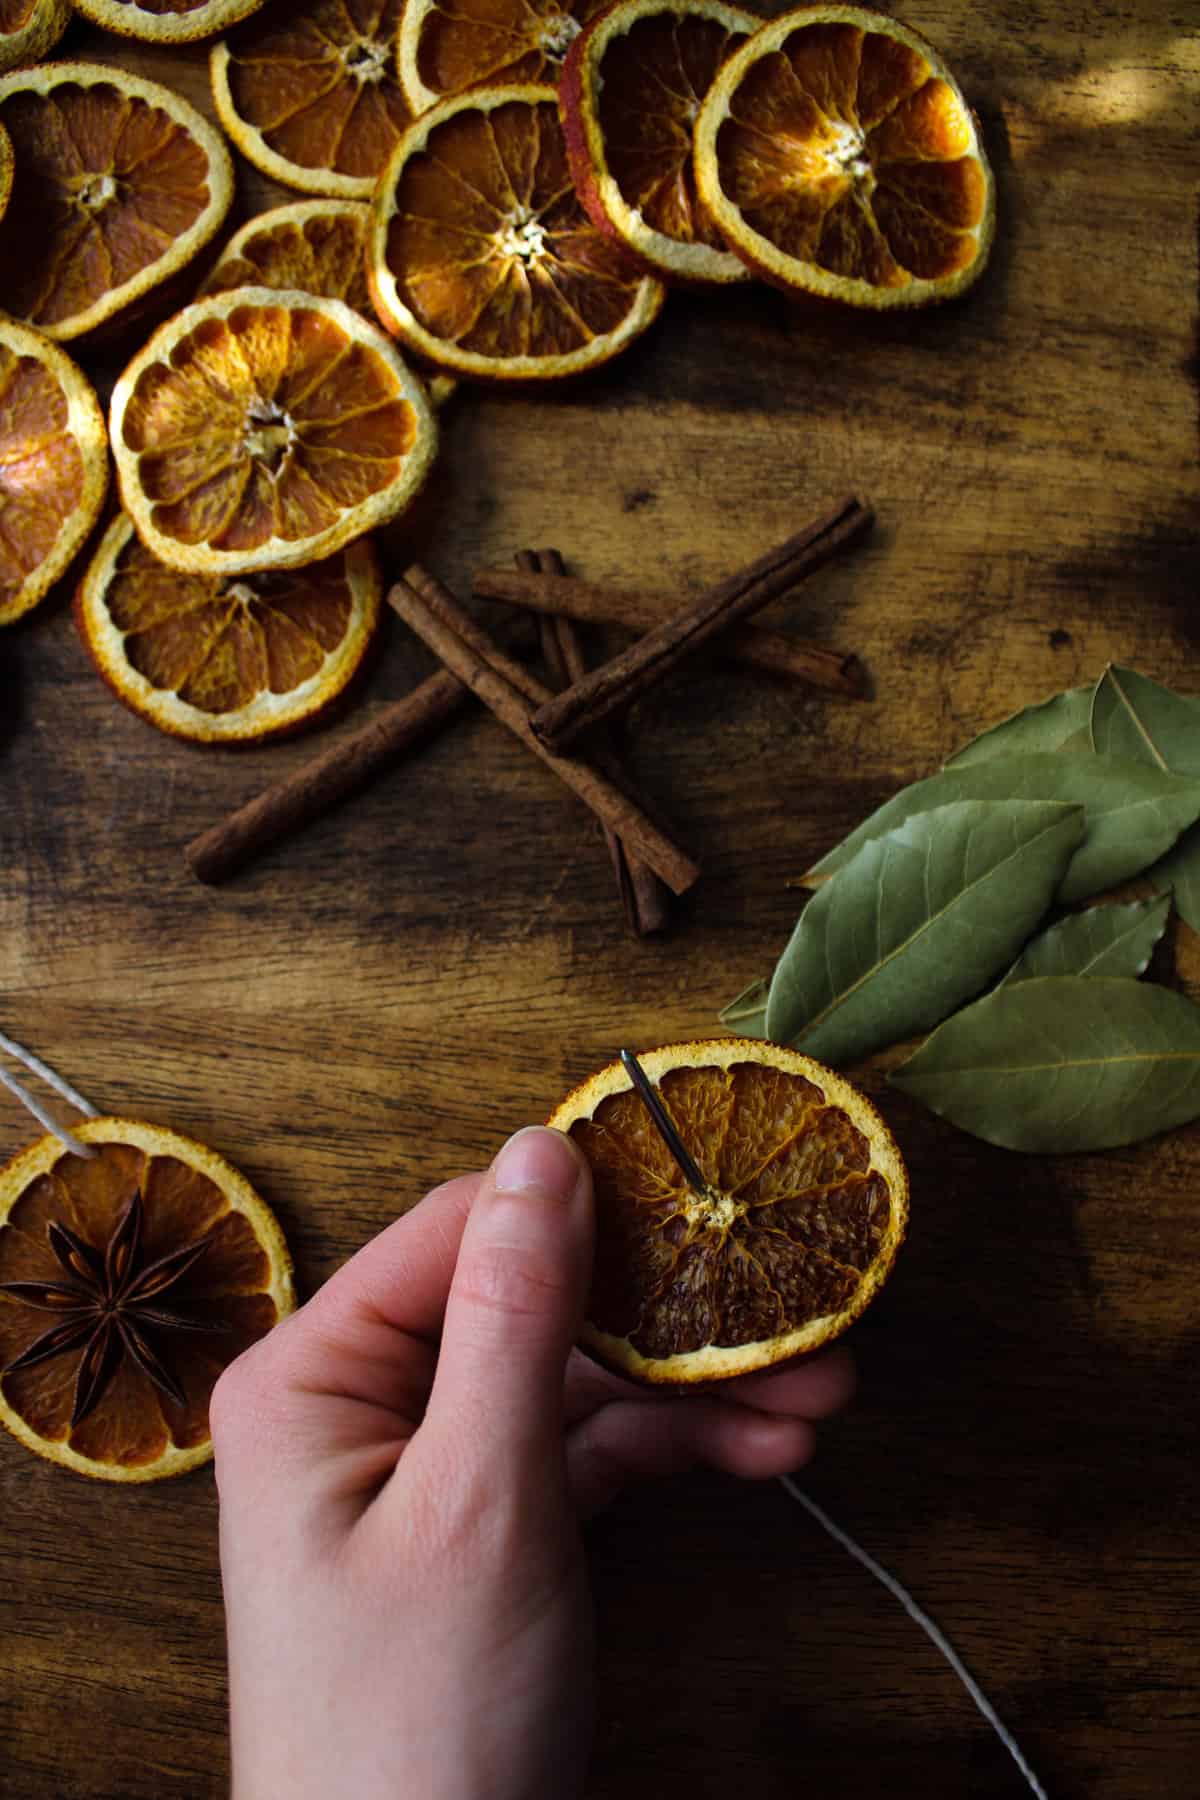
- Take a dried orange slice and a darning needle threaded with your desired type of string. Push it through the edge of the orange just after the line of the skin or through the center if looking to do a stacked style ornament.


2. Tie off your string so it creates a loop. If creating a stacked ornament: Add a bead, cranberry, or bell to the bottom and tie it off. String a layer in between each slice you add. (Cranberries, wooden beads, and bells work perfectly for this!) Create as many layers as desired and then tie a loop at the top.

3. Add any additional decorative touches by tying them on and/or hot gluing them on. and display! (Optional: Seal with Mod Podge.)

Tips
- Optional decorative elements: Cinnamon sticks, star anise, cloves, bells, rosemary, ribbons, wooden beads, popcorn, bay leaves, cranberries, small bits of pine branches, etc!
- Hang them so the face is flat or stack them to change up the look.
- Store in an air-tight jar to enjoy again next year! Can last 2-3 years or more.

Orange Slice Ornaments
Equipment
- Darning needle
- Optional: hot glue gun
- Optional: Mod Podge
Ingredients
- Dried orange slices
- Twine jute cord, ribbon, etc
- Optional: other decorative elements see notes!
Instructions
- Take a dried orange slice and a darning needle threaded with your desired type of string. Push it through the edge of the orange just after the line of the skin or through the center if looking to do a stacked style ornament.
- Tie off your string so it creates a loop. If creating a stacked ornament: Add a bead, cranberry, or bell to the bottom and tie it off. String a layer in between each slice you add. (Cranberries, wooden beads, and bells work perfectly for this!) Create as many layers as desired and then tie a loop at the top.
- Add any additional decorative touches and display! (Optional: seal with Mod Podge.)
Notes
- Optional decorative elements: Cinnamon sticks, star anise, cloves, bells, rosemary, ribbons, wooden beads, popcorn, cranberries, bay leaves, small bits of pine branches, etc!
- Hang them so the face is flat or stack them to change up the look.
- Store in an air-tight jar to enjoy again next year! Can last 2-3 years or more.


Monique
I love how creative you are! I strung a few together with cranberries in between and the look beautiful on the tree. I was also able to use a few slices with twine to add a handmade touch to a few wrapped gifts.