
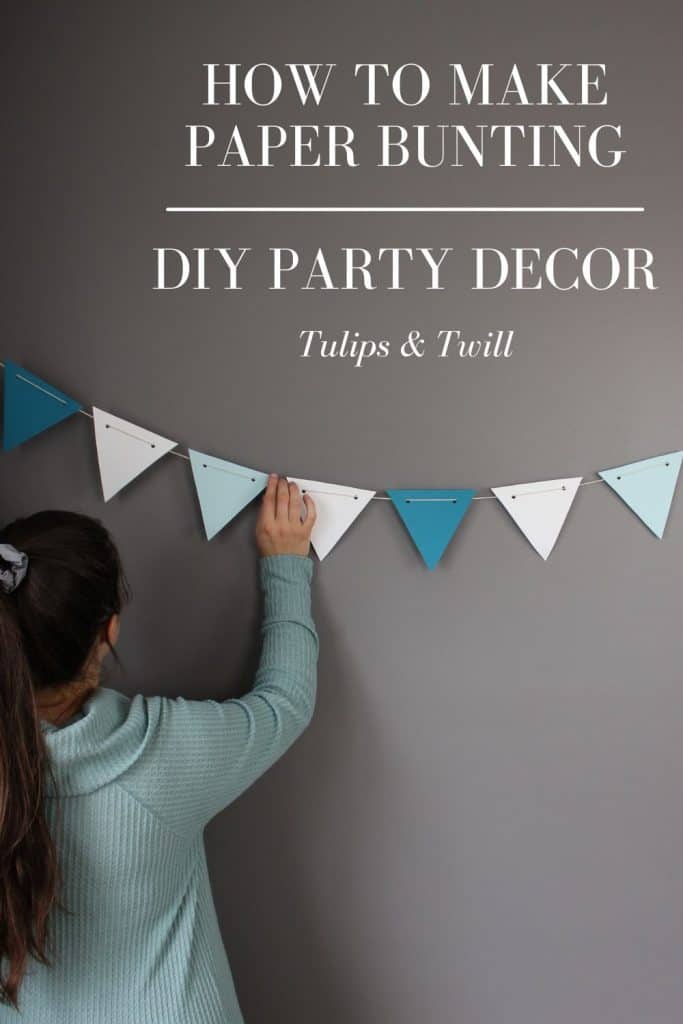
How to make a paper bunting for any occasion! Such a simple DIY party decor project!
Bunting seems to be very trendy these days! I absolutely love them and think they are adorable for all sorts of special occasions or even to use as everyday decor. You can make them in just about any shape or size you would like when you do it yourself! For this project, I wanted upside-down triangles for a classic style bunting as decor for my son’s first birthday. I am going to show you how to create this simple paper bunting out of card stock.
This paper bunting is a great last-minute DIY project that only takes a few minutes to complete! It is also a great budget-friendly option for some party decor. So before you fill your online cart with all sorts of cute decorations, make your paper bunting with this tutorial!
This Post May Contain Affiliate Links. Please Read Our Disclosure Policy.
How does a paper bunting hang?
It is so easy! You will punch two holes on each side of the top of every triangle. You will feed your string, hemp cord, ribbon, or whatever you choose through these holes!
What kind of paper should I use?
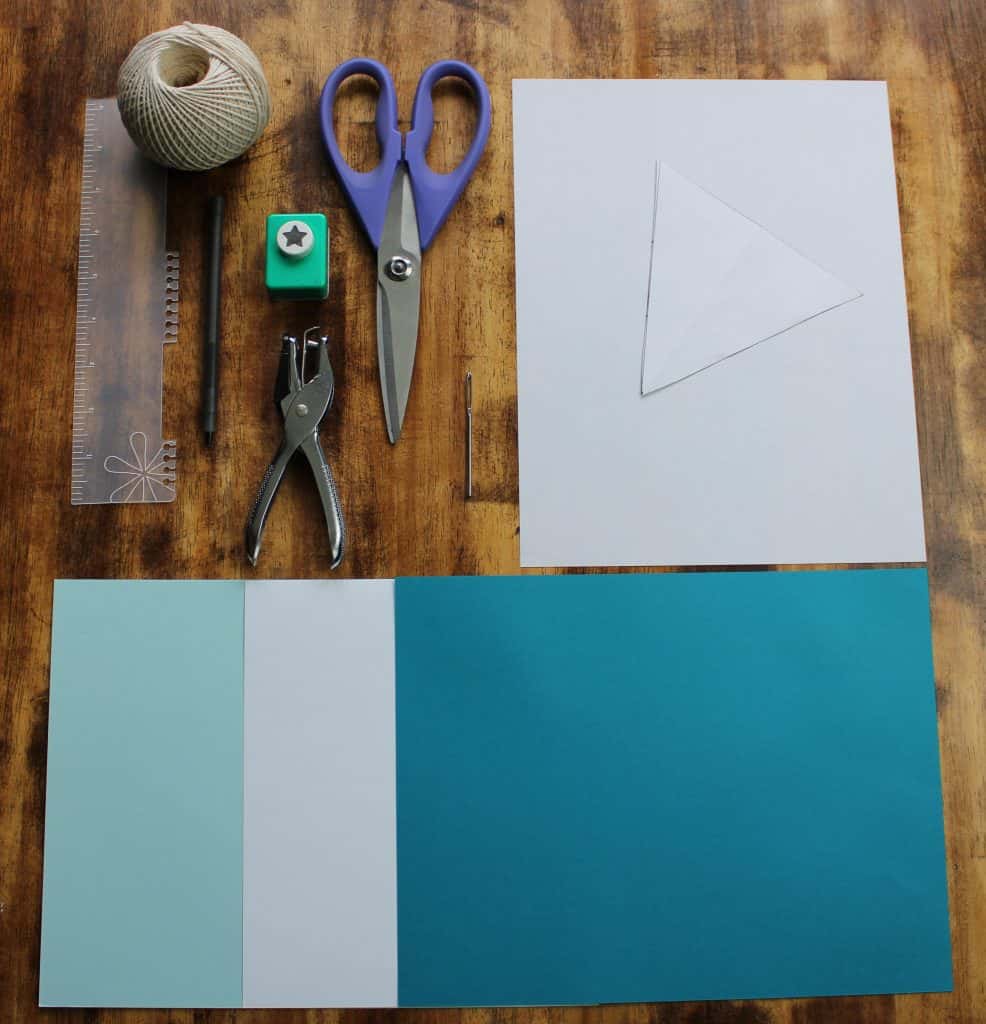
You can use any paper you would like for this project but I recommend either using card stock or scrapbook paper. I used a multipack of card stock to get two blues that would go together nicely and then a plain white.
How many shapes do I need for my paper bunting?
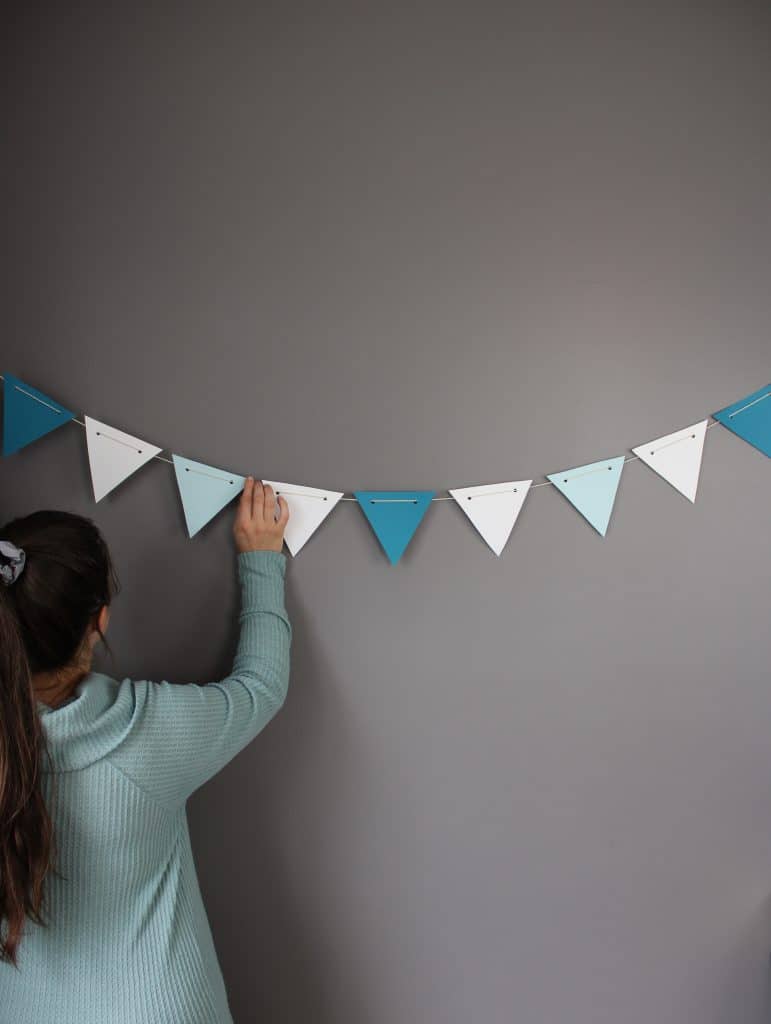
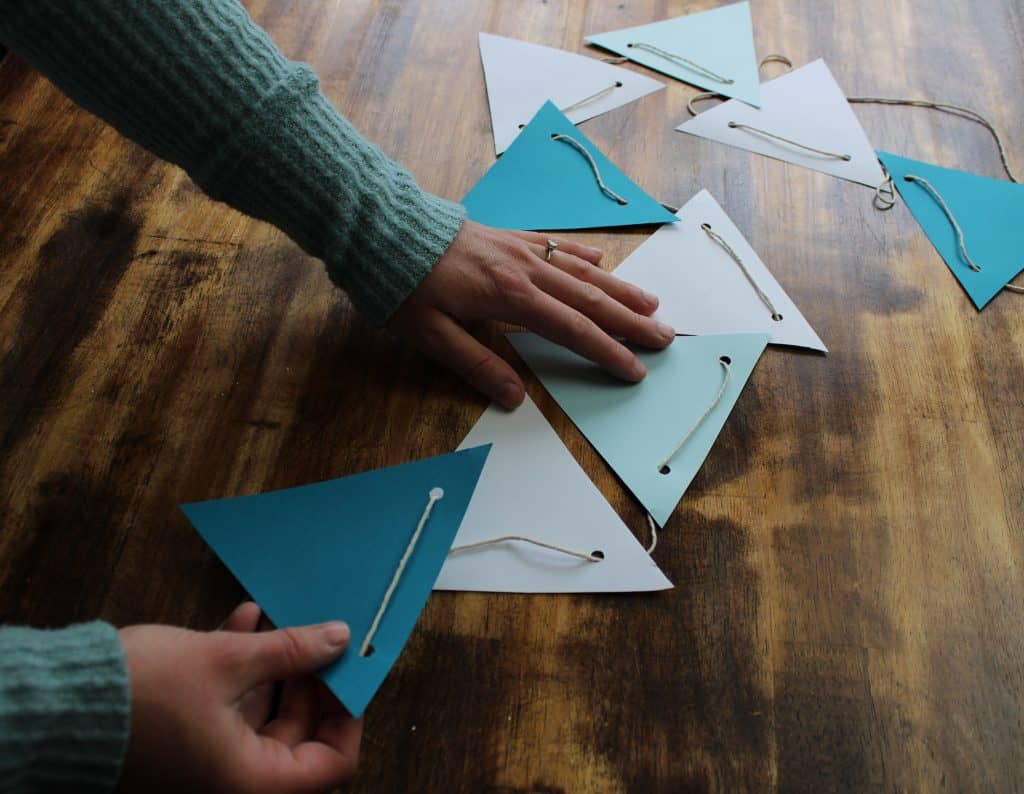
This is entirely up to you! It depends on the length you are trying to create. For my project, I decided to make nine triangles. I had two different shades of blue and a white that I wanted to make a pattern out of. The end result is exactly how I hoped it would be! The order is as follows for my project: dark blue, white, light blue, white, and repeat ending on dark blue.
PIN IT FOR LATER!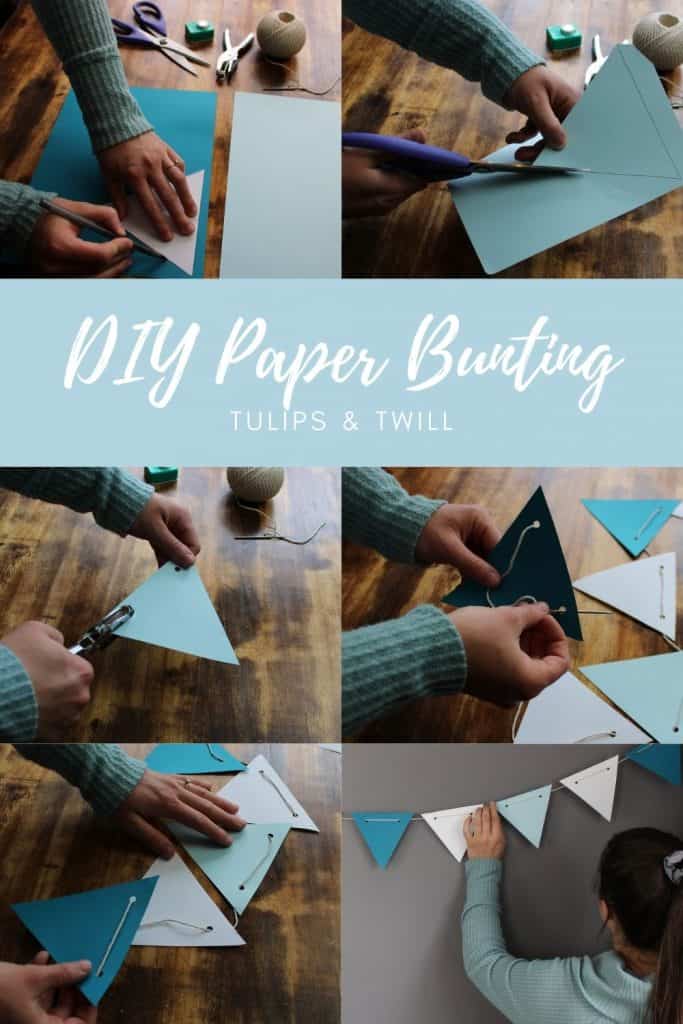
Tips to get the kids involved:
If you have a child or children who are old enough to make crafts, this can be such a fun project!
- Let them splatter paint or scribble on the paper before you cut the triangles! If you want to keep within a certain theme, offer only the colors you want to have on the bunting.
- Break out the crayons, markers, colored pencils, anything! After you cut and hole punch the triangles, allow your child/children to draw on each one. This is a GREAT way to keep them occupied while you do some last-minute prep work for your gathering!
- Are you brave? If so, get out the glue and some glitter to let them add some sparkle! Use trays or lids off of boxes to help contain at least some of the mess.
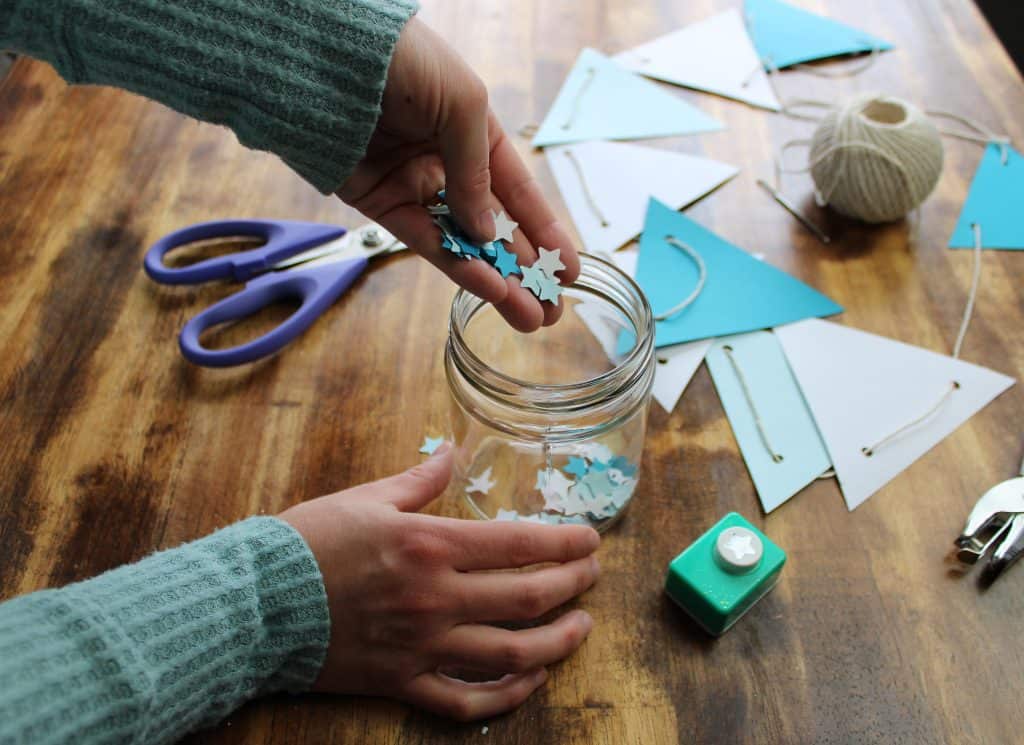
- At the end of the project, make use of the scrap paper. Take a shaped punch (I used a star) to use up all of the excess paper left after cutting out your shapes. Give your kids some glue sticks and have them put the shapes on the finished bunting before hanging. It keeps the color consistent but allows them to help with the party decor too!

What you will need to make your paper bunting:
- Paper or printed template
- Pen or pencil
- Paper of your choice
- Scissors
- Hole Punch
- Your choice of string, ribbon, hemp cord, etc
- Needle
- Thread
Steps:
- Template. Create your template or print one online and cut it out.
- To make your template yourself:
- Fold a piece of paper in half portrait style. (Also known as “hamburger style”)
- Separate it into two, keeping one half.
- Fold the newly created half sheet of paper in half once again portrait or “hamburger” style.
- Now is when you will draw your cut line. Keep in mind the size you are creating now is half of what it will be once it is unfolded. Have your pen or pencil ready. With the help of your ruler, draw a diagonal line from the top corner (or slightly in from it) on the short end to the opposite corner (or slightly above it) on the folded edge.
- Use your scissors to cut along the diagonal line you drew with your pen or pencil.
- Unfold your paper to show the newly formed triangle. All done!
2. Using a pen or pencil, trace your template as many times as needed to obtain your desired amount of triangles for your bunting.

3. Cut out each triangle using your scissors.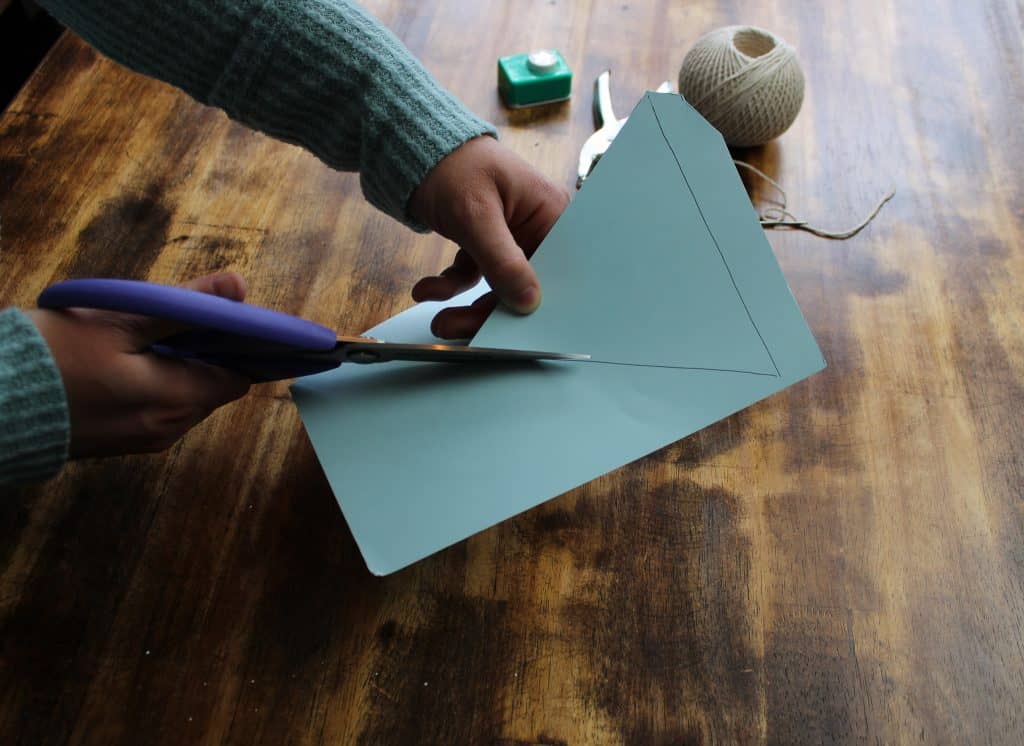
4. Use your hole punch to make 2 holes: one on each end of the shortest side of the triangle. This is the top!
5. Either by hand or using a large needle, feed the string through the holes in the top of the triangles. You can choose to have the string show through the front or have it behind, whatever look you prefer!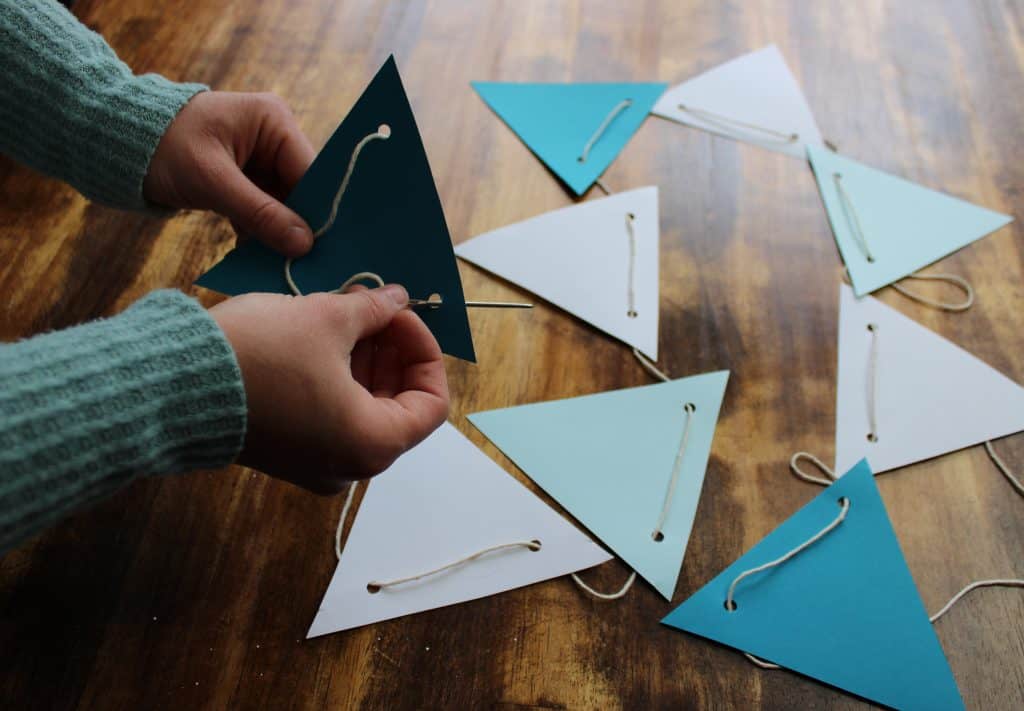
6. Space your triangles out on the string and hang it up!
Tip: Never waste anything!
I hate wasting paper!! A star-shaped punch came in handy to make use of my scrap paper. I will be using these stars in an upcoming gift I am making for all the grandparents and great-grandparents. Keep them in a jar or labeled envelope until you are ready to use them!

I had so much fun making this paper bunting! It looked really cute hung above my son’s high chair. While we may not have been able to have a gathering for his first birthday, we enjoyed watching him destroy and eat his homemade sugar-free smash cake.

How to Make a Paper Bunting | DIY Party Decor
Equipment
- Scissors
- Hole punch
- Needle
- Thread
Ingredients
- DIY paper or printed template
- Paper of your choice
- Your choice of string ribbon, hemp cord, etc.
Instructions
- Template. Create your template or print one from online and cut it out.
To make your template yourself:
- Fold a piece of paper in half portrait style. (Also known as “hamburger style”)
- Separate it into two, keeping one half.
- Fold the newly created half sheet of paper in half once again portrait or “hamburger” style.
- Now is when you will draw your cut line. Keep in mind the size you are creating now is half of what it will be once it is unfolded. Have your pen or pencil ready. With the help of your ruler, draw a diagonal line from the top corner (or slightly in from it) on the short end to the opposite corner (or slightly above it) on the folded edge.
- Use your scissors to cut along the diagonal line you drew with your pen or pencil.
- Unfold your paper to show the newly formed triangle. All done!
- Using a pen or pencil, trace your template as many times as needed to obtain your desired amount of triangles for your bunting.
- Cut out each triangle using your scissors.
- Use your hole punch to make 2 holes: one on each end of the shortest side of the triangle. This is the top!
- Either by hand or using a large needle, feed the string through the holes in the top of the triangles. You can choose to have the string show through the front or have it behind, whatever look you prefer!
- Space your triangles out on the string and hang it up!
Notes
- Use your hole punch all over the scrap paper to make confetti out of it!
- Use a shaped hole punch all over the scrap paper to save for another project in the future.
- Let the kids splatter paint or scribble on the paper before you cut the triangles! If you want to keep within a certain theme, offer only the colors you want to have on the bunting.
- Break out the crayons, markers, colored pencils, anything! After you cut and hole punch the triangles, allow your child/children to draw on each one. This is a GREAT way to keep them occupied while you do some last minute prep work for your gathering!
- Get out the glue and some glitter to let the kids add some sparkle! Use trays or lids off of boxes to help contain at least some of the mess.
- At the end of the project, make use of the scrap paper. Take a shaped punch (I used a star) to use up all of the excess paper left after cutting out your shapes. Give your kids some glue sticks and have them put the shapes on the finished bunting before hanging. It keeps the color consistent but allows them to help with the party decor too!
PIN IT FOR LATER!
What colors are you choosing for your paper bunting? Show me on Instagram by tagging me and using the hashtag #tulipsandtwill ! I cannot wait to see what you come up with to make this DIY paper bunting truly special!
What occasion will you be making this paper bunting for? Leave a comment below to let me know!


Leave a Reply