
If you're wondering how people decorate fully intact eggshells and/or use them as decor, first you need to know how to blow out an egg! Blown eggs are beautiful for natural home decor or countless DIY projects.
The Ukrainian pysanky eggs for Easter (also known as Pascha) are beyond gorgeous. While I'm still working on perfecting my egg decorating, I decided to learn how to blow out an egg for home decor so I can successfully do so when preparing to make my own pysanky! I do make my own red dyed eggs with little leaf prints on them and carefully create an Orthodox butter cross for my Pascha basket so it's nearly time I learn this craft from another culture to incorporate into our own traditions!
Not interested in the delicate and patient work of making pysanky? There are so many other lovely ways to decorate blown eggs for home decor! I have a whole list of ideas here for you today. You can use chicken, goose, or duck eggs for countless projects since they have a lovely solid base color. Still don't want to put in that effort? Then quail eggs are the best way to go for you! They're absolutely gorgeous naturally and make lovely home decor! Buy a dozen to hardboil (and maybe even pickle!) and then another dozen to blow out and use for Spring decor.

This Post May Contain Affiliate Links. Please Read Our Disclosure Policy.
Jump to:
What you need
- Darning needle - This will help you to create a small hole in the top and bottom of the egg.
- Bowl of water - You'll use this to soak and clean out your blown eggs.
- Tea towel - Lining the egg carton with a teatowel creates the perfect place to dry your eggs out on!
- Mod Podge - This seal will help to strengthen your blown eggs so they can be carefully stored and brought back out year after year.
Any eggs work for this diy! Quail, chicken, and duck eggs are widely available and are perfect for this project.

Pin it for later!

Decorating ideas & inspo
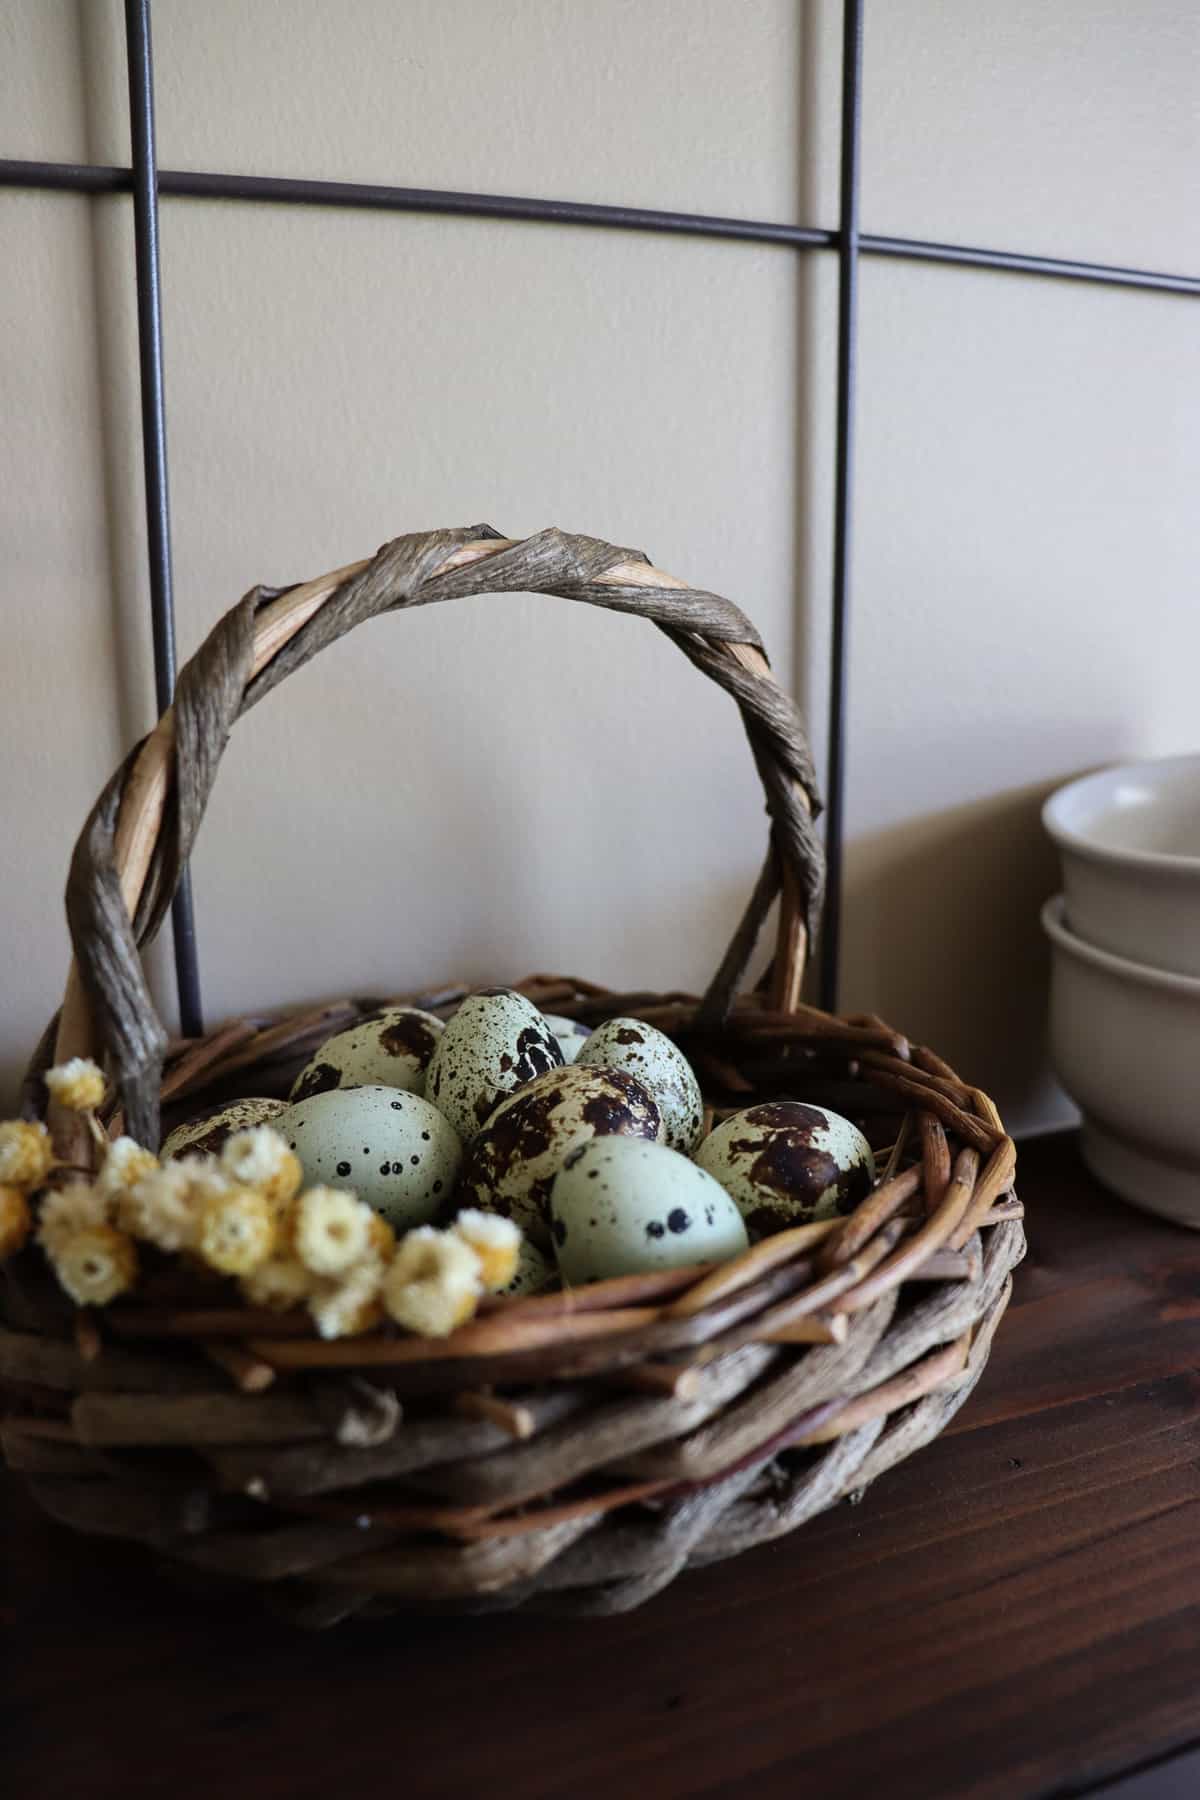
- Place your blown eggs in a basket with some dried flowers to make it look like a freshly gathered basket.
- Use Mod Podge to adhere pressed flowers to your eggs.
- Gently draw on them with permanent markers, acrylic paint and brushes, or paint markers to make a lovely design. Chicken eggs and duck eggs work beautifully for this since they have a solid color as their base!
- Decorate them with a special set of tools and a Ukrainian technique to make pysanky.
- Feed a ribbon or string through each of the blown eggs and tie a knot on each end or hot glue ribbons around the eggs and hang them like ornaments. You can put a tree branch in a pot, use a sturdy houseplant, hang them near a window, or any other creative idea that comes to your mind! Just be sure you choose a safe area where they won't be shattered since they are quite delicate.
- Decoupage them with lovely designs to suit your style.
- Dye them! Use natural ingredients or dye kits to very carefully dye these fragile blown eggs. You can create so many beautiful colors! (Remember to dye them before sealing them so the color is nice and vibrant! The eggshell without the Mod Podge will take in the color.)

Yes! They will stay beautiful for years with proper sealing and storage. Seal them with Mod Podge and store them in paper and/or bubble wrap in a special box so they are protected when they are not out on display.
Tools & Materials
- Eggs of choice (quail, chicken, goose, or duck)
- Darning needle
- Bowl
- Bowl of hot water
- Egg carton
- Tea towel
- Mod Podge
How to Blow Eggs
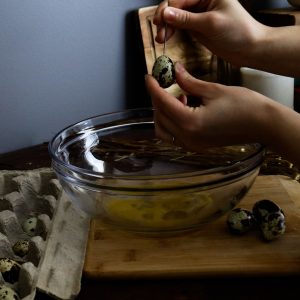
- Shake your eggs carefully to scramble the insides so it is easier to blow out.
- Very gently poke a small hole in the top and bottom of your egg. Be careful not to apply too much pressure with the needle and your fingers on the sides as you may crack the egg!
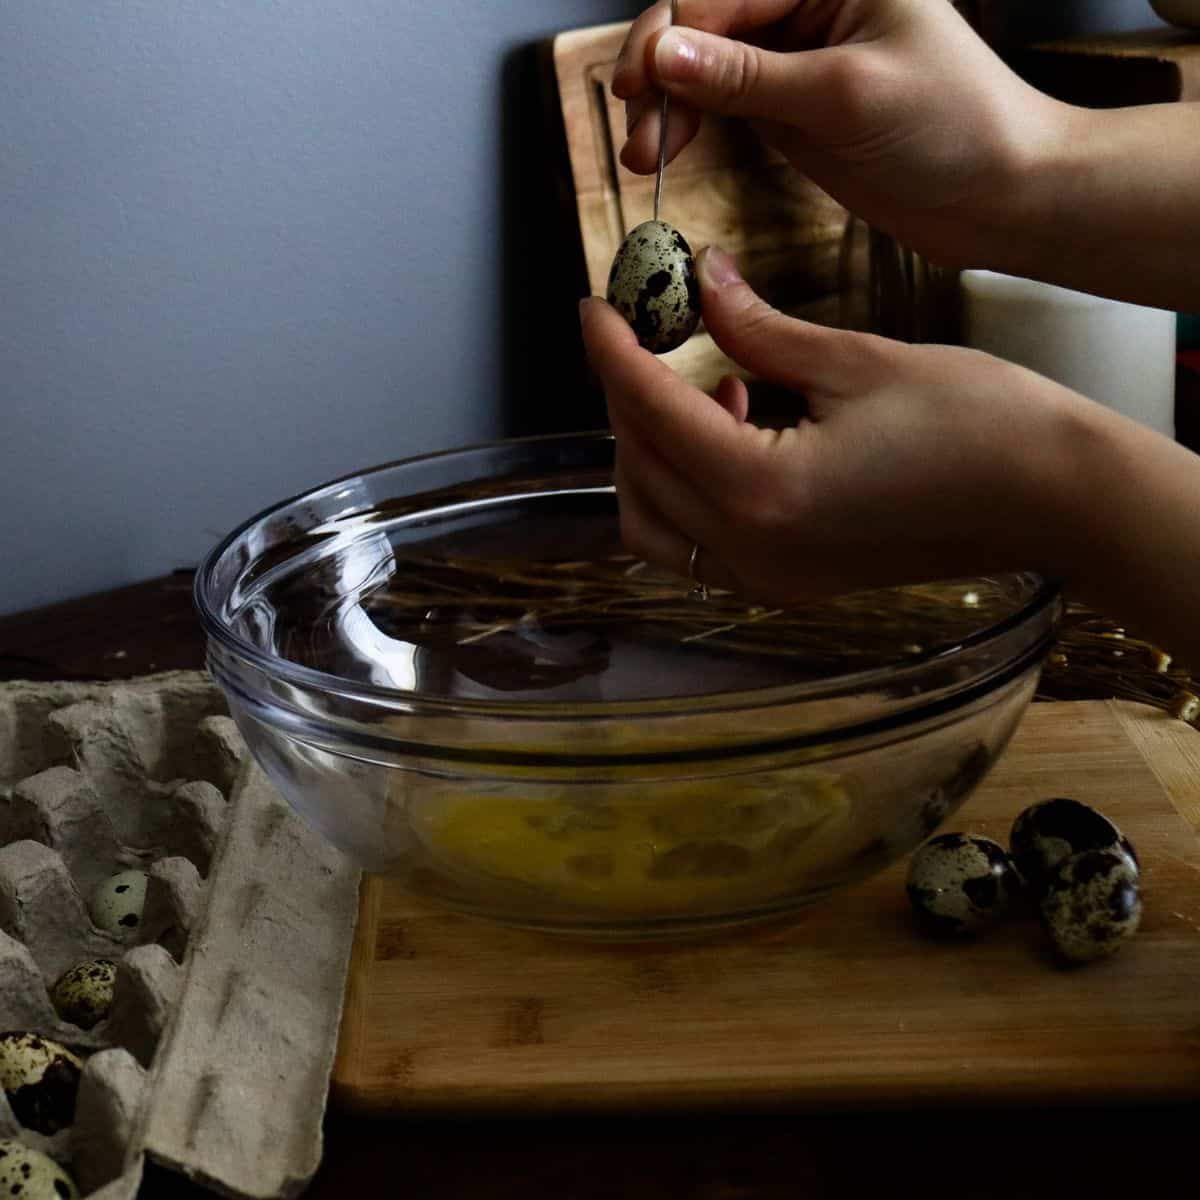

3. Over your empty bowl, blow on the top hole of your egg to push out all the insides.

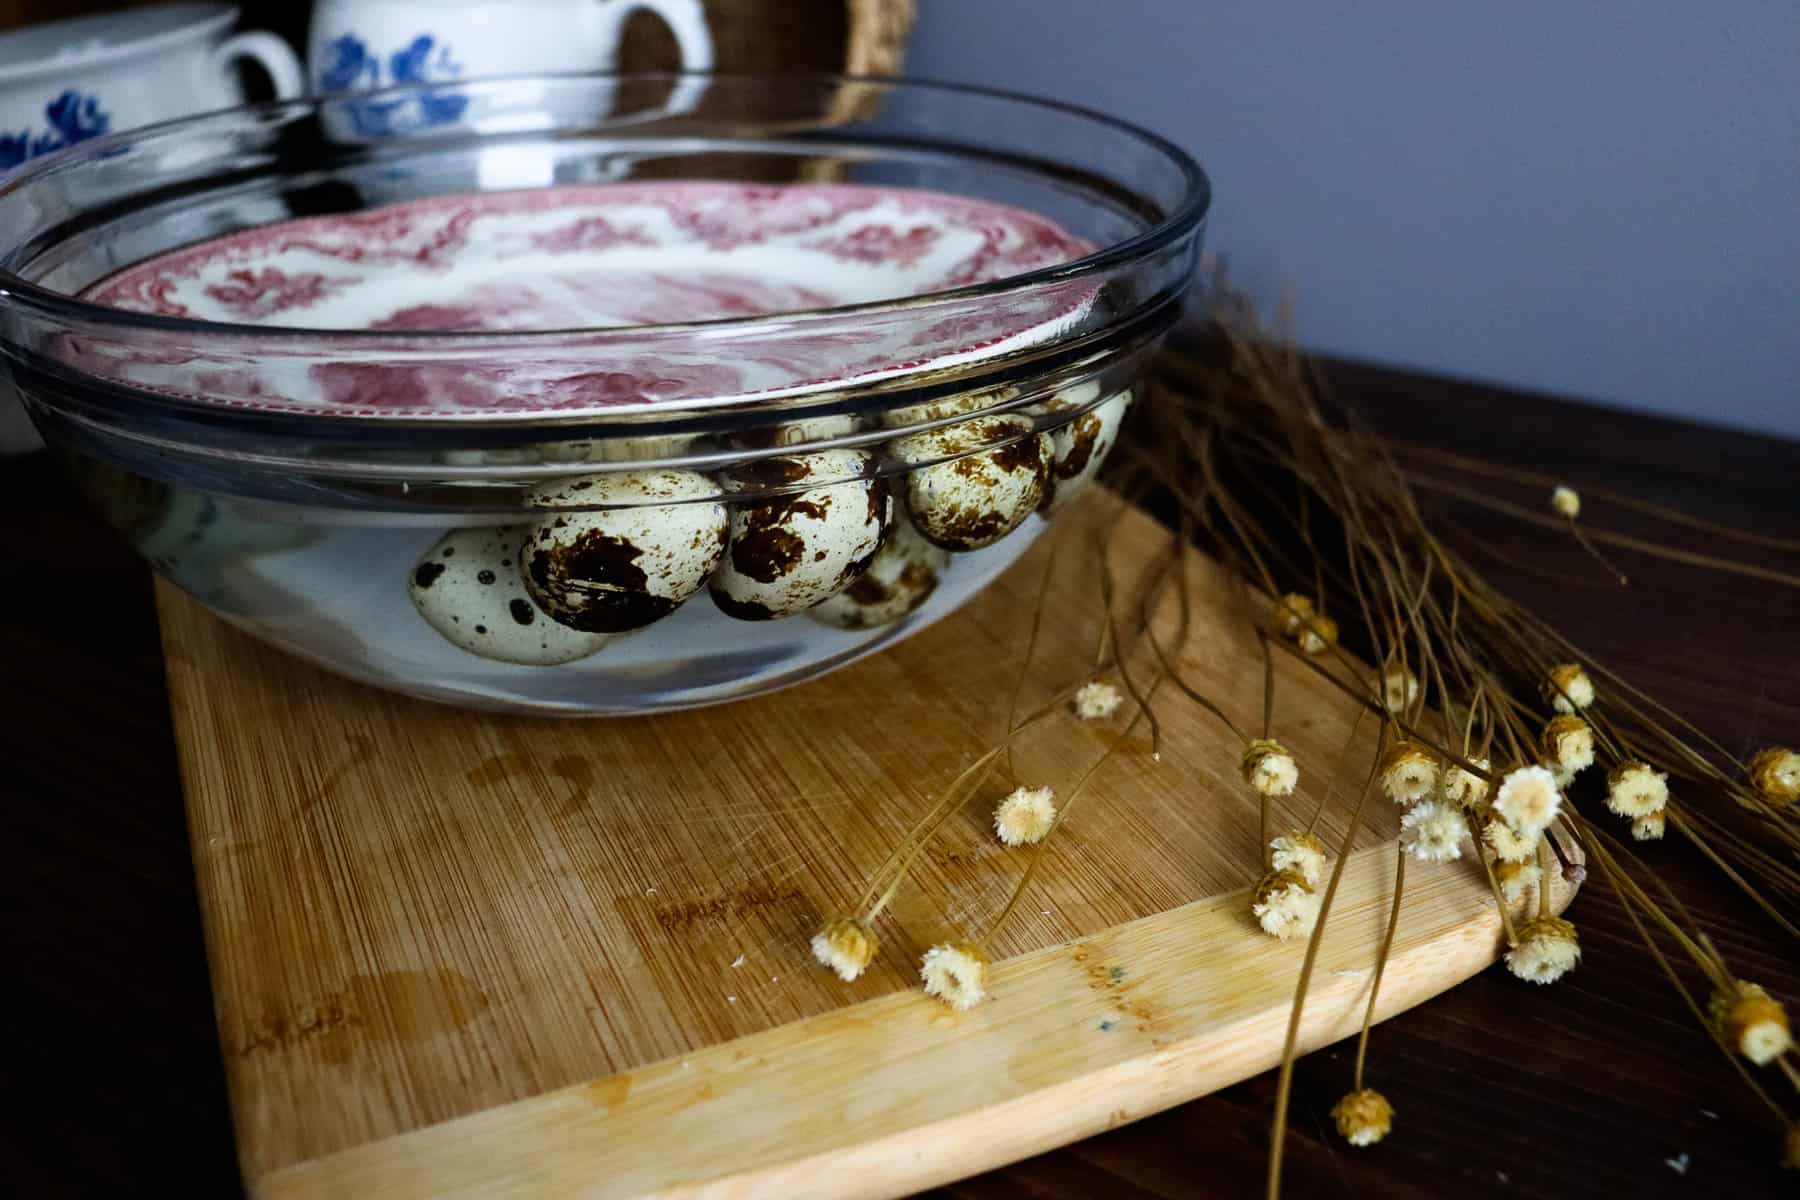
4. Place your eggs in the bowl of hot water right after you blow them. Hold each one under for a second to get water inside of it. I used a small plate as a weight to hold them under. Allow them to sit for 10 minutes.
5. Place your tea towel over your open egg carton. Press a small divet in the towel in each compartment for the eggs to go into. Place your eggs in each spot.
6. Allow them to dry for 24 hours.
7. Coat the eggs with Mod Podge. (See notes if you want to dye them!)
8. Allow your blown eggs to dry completely. Repeat the sealing process 2-3 times.
Tips
- Be sure to shake your eggs before poking any holes! This will scramble up the yolk so it doesn't crack your egg on the way out.
- When poking holes in the eggs, be very gentle. You can carefully move your needle in a circular motion to make the hole slightly larger. Work slowly and don't apply too much pressure between your fingers or your egg may break!
- Let your eggs sit for 24 hours to fully dry before coating them with Mod Podge so you are sure there isn't any moisture left inside.
- You may choose to do 2-4 coats of sealant on your eggs to ensure they are a little bit stronger. Goose eggs may only need one coat since they are already thicker to begin with. Do whatever makes you feel best!
- If you plan on dying your eggs: dye them BEFORE you coat them with Mod Podge!
Shop this post
- Darning needle
- Mod Podge
- Tea towel
- Paint markers
- Permanent markers
- Acrylic paint
- Brushes
- Ribbon
- Hot glue
- Dye kit
You may also like
How to Blow Eggs
Equipment
- Darning needle
- Bowl.
- Bowl of hot water
- Egg carton
- Tea towel
- Mod Podge.
Ingredients
- Eggs of choice quail, chicken, goose, or duck
Instructions
- Shake your eggs carefully to scramble the insides so it is easier to blow out.
- Very gently poke a small hole in the top and bottom of your egg. Be careful not to apply too much pressure with the needle and your fingers on the sides as you may crack the egg!
- Over your empty bowl, blow on the top hole of your egg to push out all the insides.
- Place your eggs in the bowl of hot water right after you blow them. Hold each one under for a second to get water inside of it. I used a small plate as a weight to hold them under. Allow them to sit for 10 minutes.
- Place your tea towel over your open egg carton. Press a small divet in the towel in each compartment for the eggs to go into. Place your eggs in each spot.
- Allow them to dry for 24 hours.
- Coat the eggs with Mod Podge. (See notes if you want to dye them!)
- Allow your blown eggs to dry completely. Repeat the sealing process 2-3 times.
Notes
- Be sure to shake your eggs before poking any holes! This will scramble up the yolk so it doesn't crack your egg on the way out.
- When poking holes in the eggs, be very gentle. You can carefully move your needle in a circular motion to make the hole slightly larger. Work slowly and don't apply too much pressure between your fingers or your egg may break!
- Let your eggs sit for 24 hours to fully dry before coating them with Mod Podge so you are sure there isn't any moisture left inside.
- You may choose to do 2-4 coats of sealant on your eggs to ensure they are a little bit stronger. Goose eggs may only need one coat since they are already thicker to begin with. Do whatever makes you feel best!
- If you plan on dying your eggs: dye them BEFORE you coat them with Mod Podge!


Leave a Reply