
Ditch the toxic resin letters and make your own beeswax letters at home! Add some herbs for a fun and unique look. So many activities await!
Herbs meet beeswax. Could there really even be a more perfect project out there? Many of my friends have been wanting to get these for their little ones but don't want to get the resin options that are widely available online. We're all trying to minimize the toxic items and products in our homes as best we can! This is a really simple DIY that can give you the exact toy you want in an eco-friendly, zero waste, and nontoxic way!
There are so many options for alphabet letter toys. Blocks, magnets, wooden, the list is endless! This is a budget-friendly DIY (no need to spend on costly materials or tools!) with so many uses. Make them for your own little ones, as a gift for someone else, as party favors, or even use them as wax melts in your warmer. The light natural scent from the beeswax really adds to the nature-inspired experience of working with these.
This Post May Contain Affiliate Links. Please Read Our Disclosure Policy.
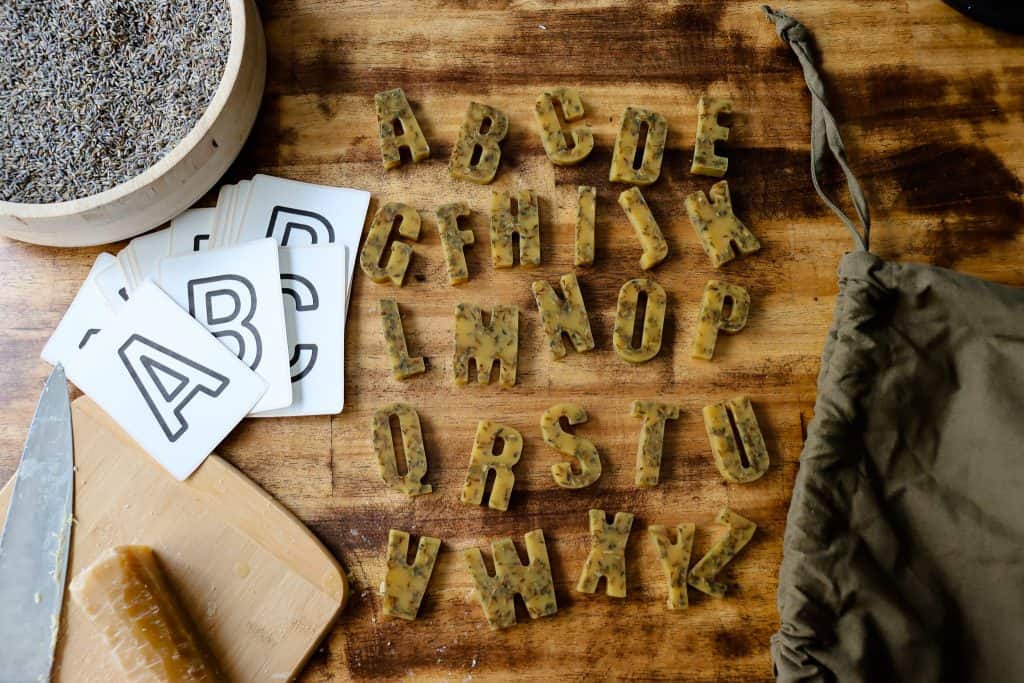
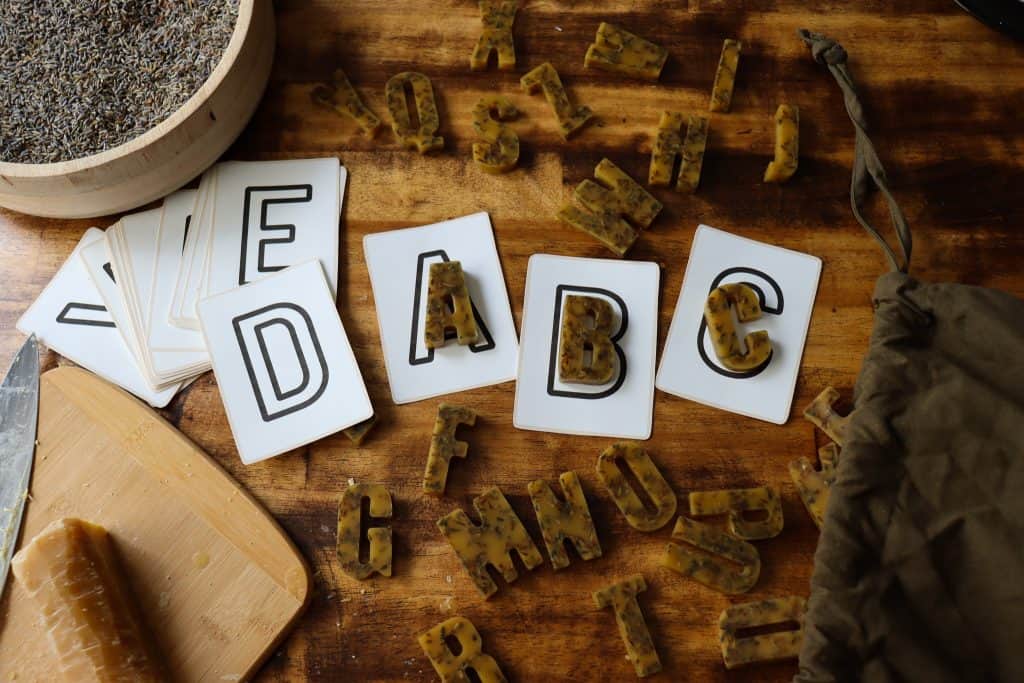
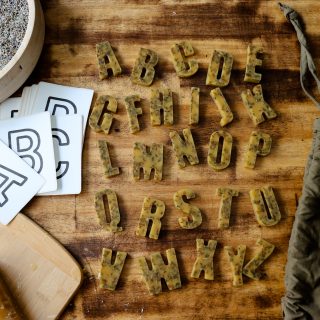
We are using our beeswax letters for alphabet games with our toddler. I'm using flashcards for matching games and simple words to spell out. The letters are so bold and clear on these cards, it is perfect for little learners who are ready for the challenge!
Worried you'll get the supplies and it'll expire? No need! Beeswax has no expiration date. You'll never have too much beeswax either, I'll make sure of that! I have so many beeswax craft ideas and projects...you'll have plenty of ways to use it all up! Let's get creating!

Why you will LOVE making herbal beeswax letters!
- These nontoxic letter toys allow for play without the concern of toxins and other unknown additives.
- Using herbs, such as dried lavender, creates a unique look while being environmentally conscious. Many resin letters have glitter and/or other small items in them for decoration that are harmful to the environment both to create as well as dispose of. Dried herbs are the best eco-conscious and zero waste option as they are organic materials!
- Get the little ones involved! This is a great beeswax art project for the whole family. Have them fill each letter themselves while you help them along. (If you are using a block of beeswax, do the cutting yourself first!) They will love seeing the wax go from solid to liquid and then back to solid. Art meets science!
- The scent is so lovely! The smell of all-natural beeswax is gorgeous but not overwhelming.
This simple beeswax craft makes some incredibly unique wax melts! Spell out any word you can imagine to use for yourself or gift to someone you love. Be sure to only use plain beeswax if this is their intended purpose. Dried herbs have the potential to burn in your wax warmer. Better to be safe than sorry!

How to source local beeswax
You may be wondering, where can I buy beeswax locally? Chances are, there are small beekeepers and apiaries closer by than you think! Use localharvest and your area code along with the appropriate filters to find a farmer near you. Ask your family and friends if they buy honey locally or go search on social media. Chances are, you will be able to find locally sourced beeswax wherever they get their honey from! Many beekeepers have Facebook pages for their business and can even be reached via phone, messenger, or email. It's truly never been easier to find local organic beeswax!
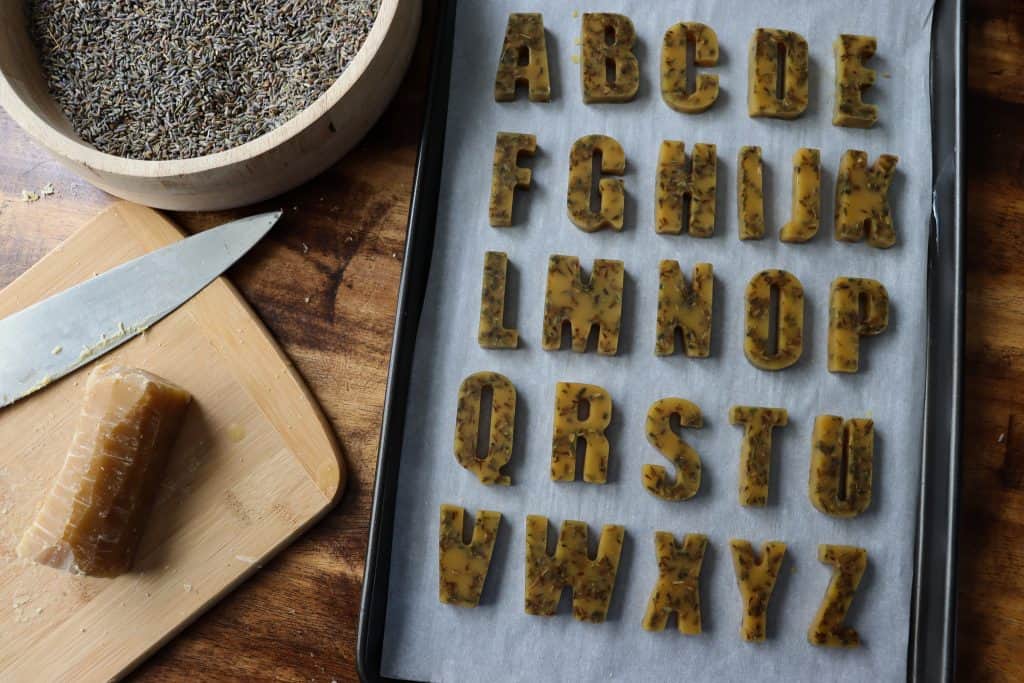
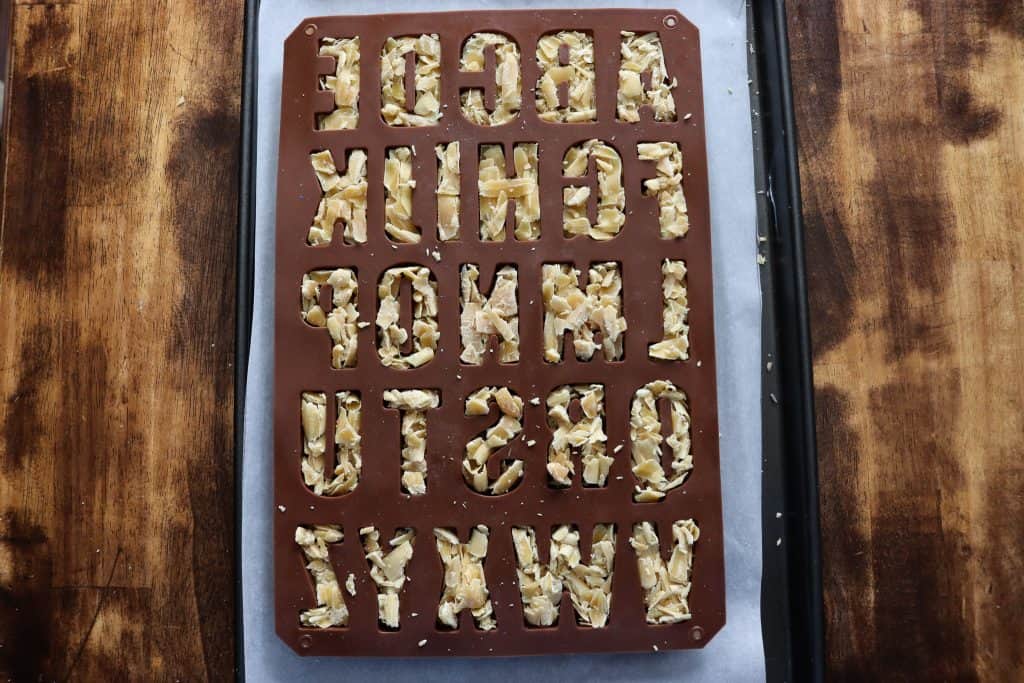
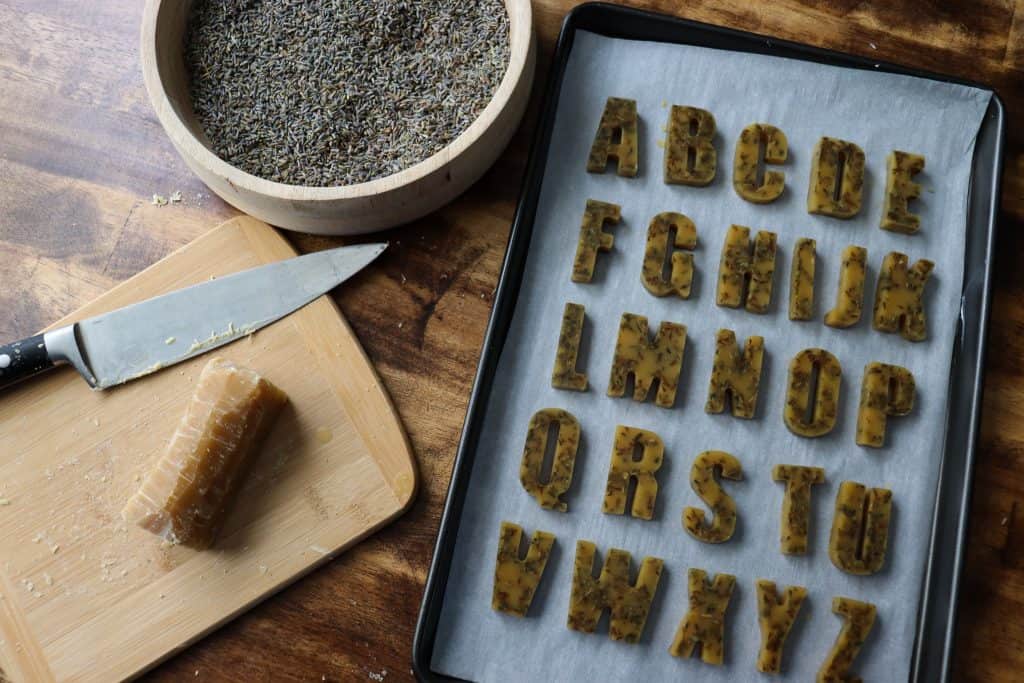
Take a sharp kitchen knife and cutting board to chop the block into small pieces that fit into your mold! It takes a little time since it is quite large and hard but don't let the size intimidate you. Work with what you have! Be sure to overfill your letters as the wax will melt down in the oven.
Where can I buy beeswax online?
If you can't/don't want to buy local, there are many online sources as well! Amazon and Etsy are great places to search for exactly what you need. You can use beeswax pellets instead of a big block if you would like. (It's the fastest way, especially if you have impatient helpers waiting!)
Overfill each letter with beeswax pellets/pastilles. So fast and easy!

Join me over on Instagram!
Follow me on Instagram and tag me when you make your own beeswax letters! Also, use the hashtag #tulipsandtwill so others can be inspired by your post too!
Fun activities and uses for your beeswax letters:
- Matching games - Match your new ABC toys with ABC flashcards!
- Beeswax gift ideas - Create each letter of your loved one's name for a sweet personalized gift.
- Practice spelling - Use your herbal beeswax letters to practice spelling basic words.
- Correct the order - Mix the letters up and have your child put them back in order.
- Learning the basics - These are the perfect alphabet learning toys for toddlers! Line them up and point as you sing the alphabet song to your little one.
- Vowel or consonant? - Have your child identify the vowels and separate them. Do this from the letters being lined up or have them laid out mixed up for an added challenge!
- Sounds - Show your child a letter and go over the letter sound.
- Show an image - Ask your little learner what letter it starts with (ex: Bird=B!) and have them match the correct letter.
How to make DIY Beeswax Letters
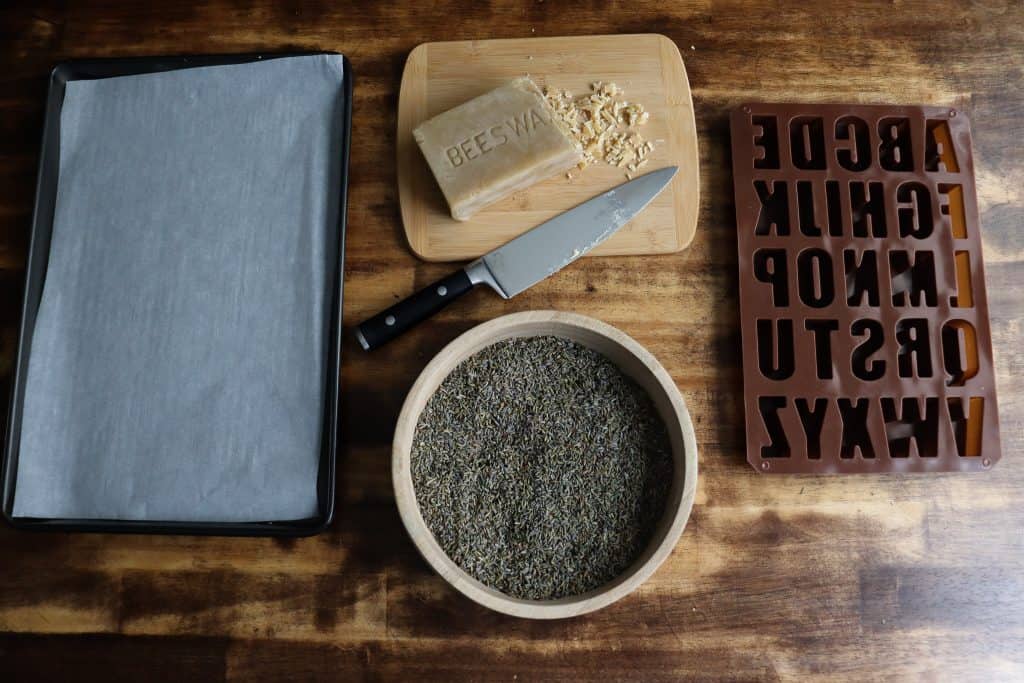
Materials
- Silicone letter mold.
- Beeswax.
- Herb of choice (lavender.)
- Knife (if using a block of beeswax.)
- Baking sheet.
- Optional: parchment paper.
Steps
- Preheat your oven to 300°F.
- Cut your parchment paper to fit the bottom of your baking sheet. Place the mold on it.
- Take small amounts of dried lavender. Make a single layer in the bottom of each letter.


4. Chop your beeswax block into small pieces that will fit into the mold and overfill each letter. (It will melt down so you want to be sure it's filled up!!)

5. Pop it in the oven and set a timer for 20 minutes.
6. Now the beeswax is completely melted. Carefully remove from the oven and set aside to cool and harden overnight.
7. If your letters aren't thick enough due to not fitting enough beeswax in (ex: using rose or another bulkier herb) you may need to add in more beeswax and repeat the melting and setting process again!
8. Carefully remove each letter from the mold. Move the sides a bit to gently pull the edges away from the wax to make it easier. Slow and steady so you don't crack them! Have fun playing with your herbal beeswax letters!
Tips
- Be sure to fill your letter mold to the very top of each letter with beeswax as it will melt down. You don't want them to be too thin and breakable.
- If any melted beeswax ends up on the edges of your mold, the parchment paper, or even the baking sheet be sure to scrape it off and save it for future use! (Zero waste!)
- Allow your letters to cool for at least 3 hours. If you are questioning if they are fully solid, let them rest overnight to be safe.
- If your letters aren't thick enough due to not fitting enough beeswax in (ex: using rose or another bulkier herb) you may need to add in more beeswax and repeat the melting and setting process again!
- Gently tug the sides of the mold around each letter before removing them to ensure nothing is sticking too tightly.
- Be patient and work slowly as you take your letters out of the mold to avoid cracking.
- Do NOT add dried herbs if you plan to use these as wax melts. Leave the letters plain so that they don't burn in your wax warmer.
- Always supervise young children with these as they could bite part of them off and create a choking hazard.

More Fun DIYs and Beeswax Projects
Homemade Calendula Salve (with Beeswax)
Are you going to make your own?
Leave a comment below and tell us...will you make your letters plain beeswax or will you be adding in some dried lavender?
DIY Beeswax Letters
Equipment
- Silicone letter mold
- Knife. if using a block of beeswax
- Baking sheet.
- Optional: parchment paper
Ingredients
- Beeswax
- Herb of choice lavender
Instructions
- Preheat your oven to 300°F.
- Cut your parchment paper to fit the bottom of your baking sheet. Place the mold on it.
- Take small amounts of dried lavender. Make a single layer in the bottom of each letter.
- Chop your beeswax block into small pieces that will fit into the mold and overfill each letter. (It will melt down so you want to be sure it's filled up!!)
- Pop it in the oven and set a timer for 20 minutes.
- Now the beeswax is completely melted. Carefully remove from the oven and set aside to cool and harden overnight.
- If your letters aren't thick enough due to not fitting enough beeswax in (ex: using rose or another bulkier herb) you may need to add in more beeswax and repeat the melting and setting process again!
- Carefully remove each letter from the mold. Move the sides a bit to gently pull the edges away from the wax to make it easier. Slow and steady so you don't crack them! Have fun playing with your herbal beeswax letters!
Notes
- Be sure to fill your letter mold to the very top of each letter with beeswax as it will meltdown. You don't want them to be too thin and breakable.
- If any melted beeswax ends up on the edges of your mold, the parchment paper, or even the baking sheet be sure to scrape it off and save it for future use! (Zero waste!)
- Allow your letters to cool for at least 3 hours. If you are questioning if they are fully solid, let them rest overnight to be safe.
- If your letters aren't thick enough due to not fitting enough beeswax in (ex: using rose or another bulkier herb) you may need to add in more beeswax and repeat the melting and setting process again!
- Gently tug the sides of the mold around each letter before removing them to ensure nothing is sticking too tightly.
- Be patient and work slowly as you take your letters out of the mold to avoid cracking.
- Do NOT add dried herbs if you plan to use these as wax melts. Leave the letters plain so that they don't burn in your wax warmer.
- Always supervise young children with these as they could bite part of them off and create a choking hazard.


tulipsandtwill
Alli,
Thank you so much! Give it a try!
-Mariana
tulipsandtwill
Julie,
Thank you so much, I am so glad!
-Mariana
Julie
These are so creative! I love it!
Alli Queen
Such an awesome idea! !
Meaghan
These are so beautiful – saving this idea for the future!
tulipsandtwill
Jill,
Give them a go, what perfect timing! I also highly recommend checking this out for your littles to learn more: https://natureinspiredlearning.com/category/insects/ There are bee-related activities as well as other bug-related content!
-Mariana
tulipsandtwill
Jo,
Thank you so much! They do it's wonderful!
-Mariana
Jill
What a fun idea! We homeschool and are working on a 'Bee Unit' this would be such a fun activity! Thank you for sharing!
tulipsandtwill
Julie,
Thank you so much!
-Mariana
tulipsandtwill
Jenny,
Thank you so much! Be sure to share your photos, I can't wait to see them! Happy making!
-Mariana
Jenny
Wow! Mariana, I love these. What a wonderful idea and thanks for the clear instructions. I'm going to try to make some this weekend.
Julie
Absolutely love these handmade letters. Wonderful as hands-on manipulatives for little ones! Thanks for the easy step by step directions.
Jo SImms
I'm in love! These are so cute. I like the idea of adding lavender they must smell lovely.
tulipsandtwill
Melissa,
Thank you so much! I hope you give it a try!
-Mariana
Melissa
What a fun project!