
Salt dough ornaments are perfect for preserving your children's precious handprints and footprints. (Or your favorite furry friend's paw prints!) You can also use different cookie cutters to easily create fun festive shapes. I made one of each of my children's handprints for their first Christmas.
Reminder: don't put too much pressure on yourself! It's okay to do it a little early or a little late. The holiday season can be crazy and busy. If you can't make your salt dough ornaments right away, that's alright. If you use this craft to help yourself slow down during this time and be intentional, that's also fantastic! Don't let any mom guilt get to you. This is meant to be fun!
Be sure to check out the printable salt dough recipe at the bottom of this post. I keep things like this printed out in a binder so I don't have to go searching for them every year. Pinning them on Pinterest helps me to keep organized as well when I don't have time to print (or if I just don't want to!)
I also made a festive paper bunting this year as part of our decor. It is so cute for photos and is a simple low-pressure diy. Anything that doesn't take up a lot of time is ideal this time of year! I tried to make as many homemade gifts as I could this year including herbal beeswax letters, rose bath salts, and herbal oatmeal bath bombs! Giving handmade gifts is truly so special.

This Post May Contain Affiliate Links. Please Read Our Disclosure Policy.
What are Salt Dough Ornaments?
Salt dough ornaments are simple homemade keepsakes. They're a fun and easy project you can include the whole family in with only a few inexpensive ingredients you may already have on hand. I have this simple salt dough recipe written out here for you to have fun with annually.
They harden in the oven while they bake! You will know they are done when they are fully hardened. No need to leave them to air dry for days on end!

Why You'll Love This Project
- As mentioned, it's a great way to keep those precious handprints and footprints!
- You can make these for your tree. These salt dough ornaments are guaranteed to be a unique personal touch!
- The kids will love helping! They can cut out the shapes and help to paint them after! Choose a color scheme or let them take the lead with color choices and prepare the painting stations in advance to make it easier on everyone. I like to set up any needed items while they are in the oven!
- It is inexpensive and easy! Two dry ingredients and some water is all it takes.
- They don't have to be perfect! Homemade is the best and I'll bet you will cherish these for years to come.
- You can use them on little stands on shelves. They can become a part of a little scene in your home on any surface.
- Create a garland. Be sure to use smaller salt dough ornaments for this task! String them equal distances across the top of your fireplace for a homemade festive garland!
I seal mine with Mod Podge. This makes them last forever! Make sure to coat your salt dough ornaments all over to properly preserve them.
Join me over on Instagram!
Follow me on Instagram and tag me when you make your own salt dough ornaments! Also, use the hashtag #tulipsandtwill so others can be inspired by your post too!
What Youll Need to Make Salt Dough Ornaments
- Large mixing bowl.
- Measuring cups.
- Optional: a large spoon (or just use your hands!)
- Rolling pin.
- Cookie cutters.
- Reusable straw (this is for making the hole for hanging your ornament! you can also use a chopstick, pencil/pen, or anything that will make a small hole.)
- Optional: Knife or pizza cutter to make shapes.
- Baking sheet.
- Parchment paper.
- Paintbrushes.
- Paint and other desired craft materials for decorating.
- Mod Podge.
- Ribbon, string, or wire.

Ingredients
- 2 cups all purpose flour.
- 1 cup salt.
- 1 cup warm water.

How to Make Salt Dough Ornaments
- Preheat your oven to 200°F. Cut your parchment paper to line the bottom of your baking sheet. Set aside.
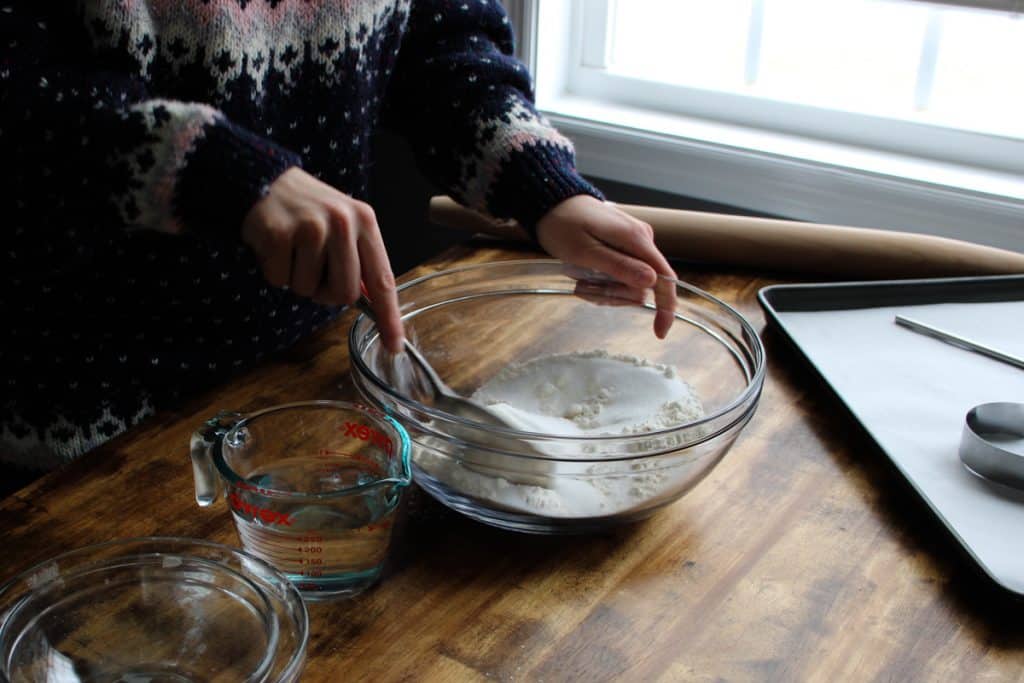
- Measure out and combine your flour and salt in your large mixing bowl. Use your spoon or your hands.
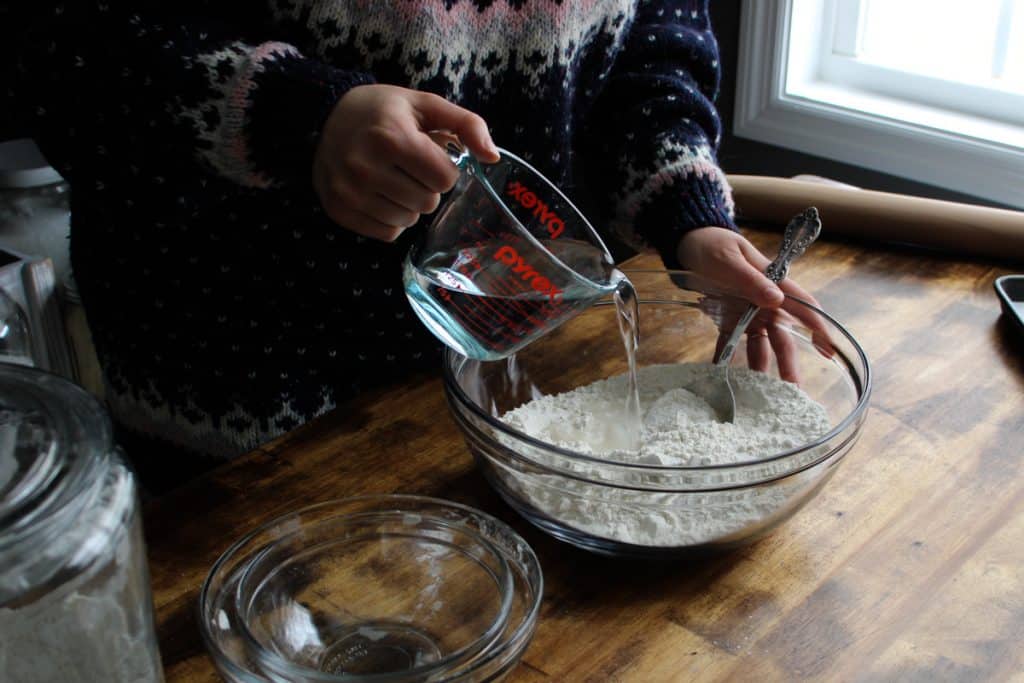
3. Measure and thoroughly mix in your warm water. Use your wooden spoon or your hands.
4. Work the dough so it's easy to roll out.

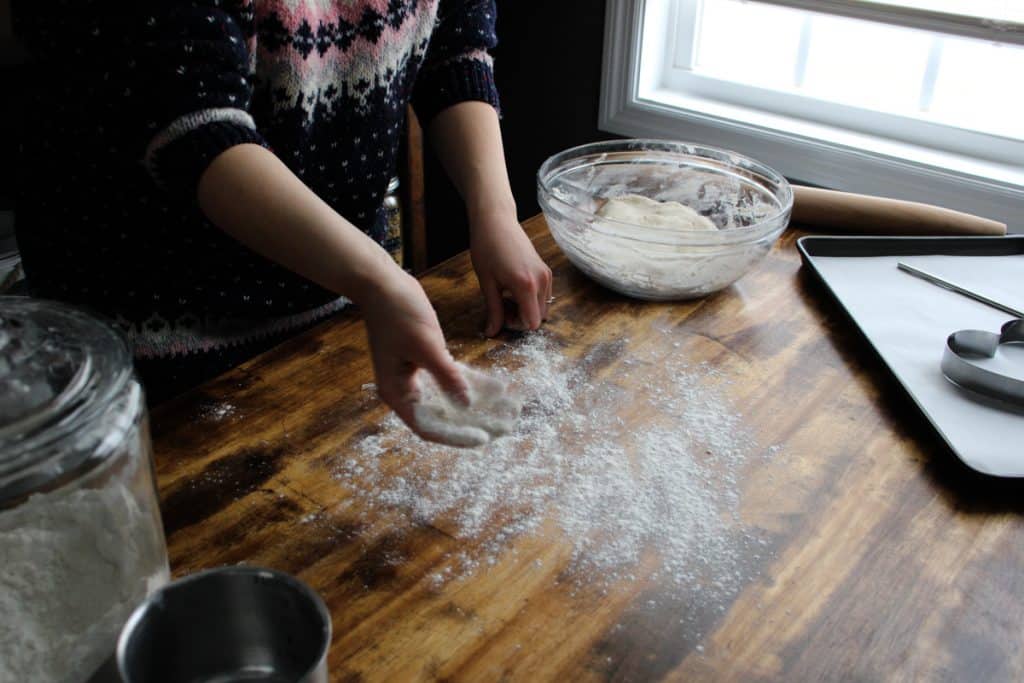
5. Lightly flour your work surface and rolling pin.
6. Either prepare to work with all of your dough or separate it into smaller balls to roll out one at a time.
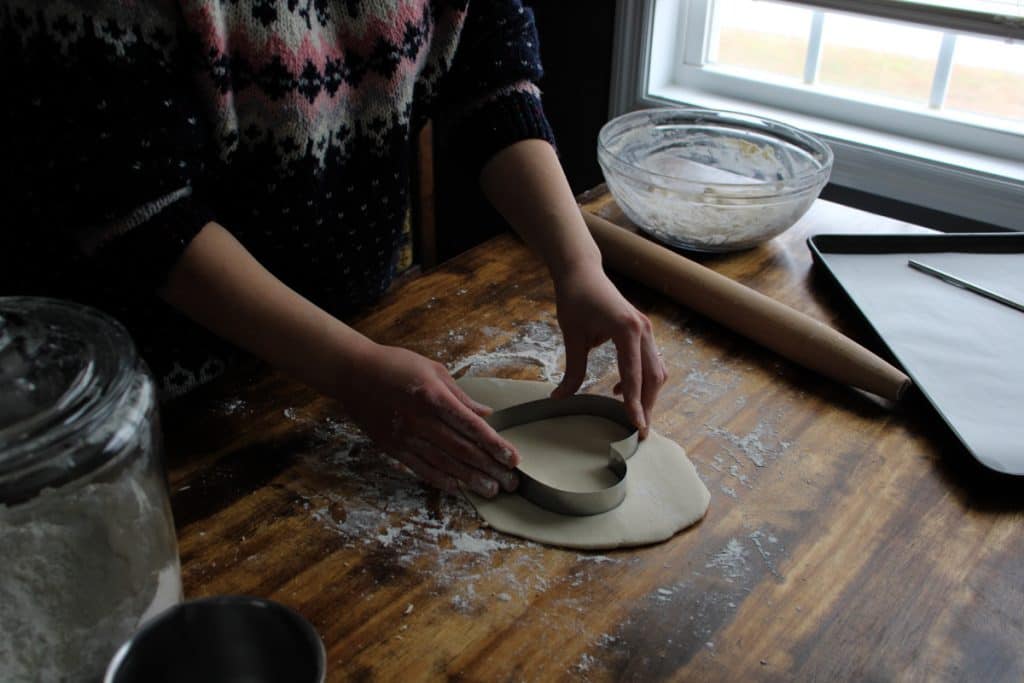
7. Roll your dough out evenly. Be sure it is thin but not too thin!

8. Use your cookie cutters, knife, and/or pizza cutters to create your desired shapes!
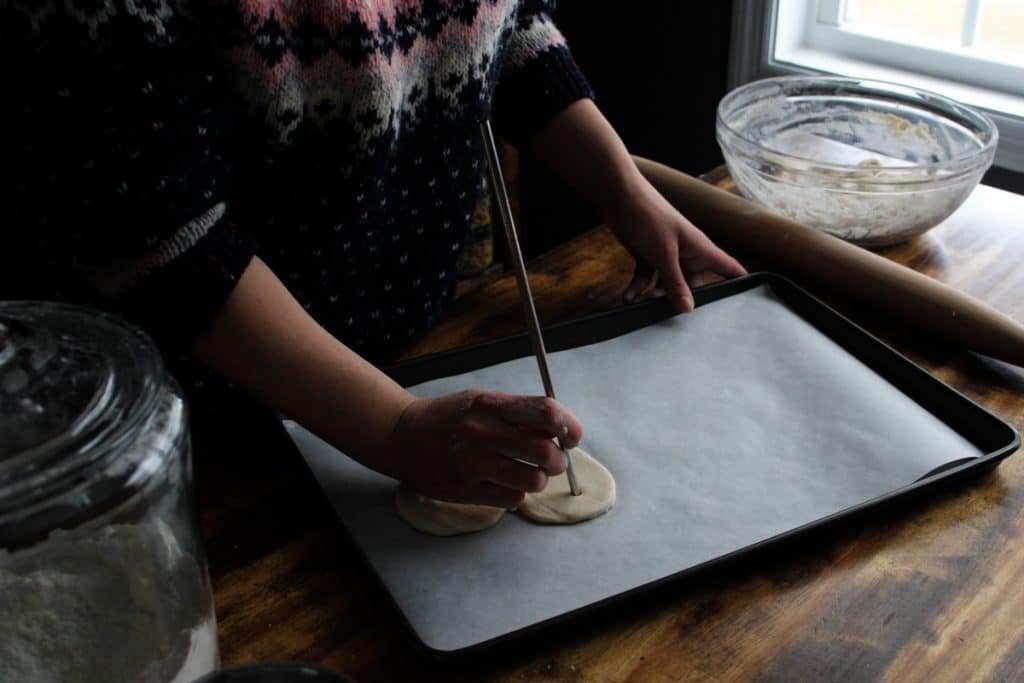
9. Place the shapes on your parchment-lined baking sheet.
10. Now is the time to gently add any hand, paw, or footprints!
11. Use your reusable straw to create the hole that you will use to hang your ornament from.
12. Bake for 1-2 hours depending on thickness. I check on mine every 30 minutes and turn the pan each time. They are done once they are hard! (Caution: don't touch them they are hot!)
13. Once complete, remove them from the oven and allow them to cool.
14. After they are fully cooled off, it's time to paint, decorate, and seal them! Get creative!


15. After they dry you can tie string, ribbon, or a metal wire through the hole. Go hang your beautiful salt dough ornaments up on the tree and enjoy!

Helpful Tips for the Best Salt Dough Ornaments
- Be sure to roll your dough out evenly and thin but not too thin! I made the mistake before of rushing and I ended up with ornaments that weren't completely flat!
- You may need a spatula to remove and transfer your salt dough ornament from your work surface to the parchment-lined baking sheet. It really helps if you are making a larger shape!
- How to know your ornaments are done in the oven: they should be hard! I test mine out by poking them with a toothpick.
- Allow the salt dough ornaments to fully cool before painting or decorating.
- Don't forget to write any information you want on the back before you seal the ornaments! (Examples: names, dates, the year, a sweet message, etc.)
- Using Mod Podge or a spray sealer will help to preserve these for years to come!
- Be sure to store them as you would any other fragile decorations. Wrap them and store them nicely along with your other seasonal decor. You want to be sure these precious keepsakes are safe and sound!
Other DIY Gifts and Decor for the Holiday Season!
What holiday traditions do you enjoy with your family?
Leave a comment below and tell me all about it!

How to Make Salt Dough Ornaments
Equipment
- Large mixing bowl.
- Optional: a large spoon (or just use your hands!)
- Rolling Pin
- Cookie cutters.
- Reusable straw (this is for making the hole for hanging your ornament!)
- Optional: Knife or pizza cutter to make shapes.
- Baking sheet.
- Parchment paper.
- Paintbrushes.
- Paint and other desired craft materials for decorating.
- Mod Podge.
- Ribbon, string, or wire.
Ingredients
- 2 cups all purpose flour
- 1 cup salt
- 1 cup warm water
Instructions
- Preheat your oven to 200°F. Cut your parchment paper to line the bottom of your baking sheet. Set aside.
- Measure out and combine your flour and salt in your large mixing bowl. Use your wooden spoon or your hands.
- Measure and thoroughly add in your warm water. Use your wooden spoon or your hands.
- Work the dough so it's easy to roll out.
- Lightly flour your work surface and rolling pin.
- Either prepare to work with all of your dough or separate it into smaller balls to roll out one at a time.
- Roll your dough out evenly. Be sure it is thin but not too thin!
- Use your cookie cutters, knife, and/or pizza cutters to create your desired shapes!
- Place the shapes on your parchment-lined baking sheet.
- Now is the time to gently add any hand, paw, or footprints!
- Use your reusable straw to create the hole that you will use to hang your ornament from.
- Bake for 1-2 hours depending on thickness. I check on mine every 30 minutes and turn the pan each time. They are done once they are hard! (Caution: don't touch them they are hot!)
- Once complete, remove from the oven and allow them to cool.
- After they are fully cooled off, it's time to paint, decorate, and seal them! Get creative!
- After they dry you can tie string, ribbon, or a metal wire through the hole. Go hang your beautiful salt dough ornaments up on the tree and enjoy!
Notes
- Be sure to roll your dough out evenly and thin but not too thin! I made the mistake before of rushing and I ended up with ornaments that weren't completely flat!
- You may need a spatula to remove and transfer your salt dough ornament from your work surface to the parchment lined baking sheet. It really helps if you are making a larger shape!
- How to know your ornaments are done in the oven: they should be hard! I test mine out by poking them with a toothpick.
- Allow the salt dough ornaments to fully cool before painting or decorating.
- Don't forget to write any information you want on the back before you seal the ornaments! (Examples: names, dates, the year, a sweet message, etc.)
- Using Mod Podge or a spray sealer will help to preserve these for years to come!
- Be sure to store them as you would any other fragile decorations. Wrap them and store them nicely along with your other seasonal decor. You want to be sure these precious keepsakes are safe and sound!


Leave a Reply