
As you learn new skills in the kitchen, you may be figuring out how to make kefir from raw milk. Fermented dairy has many health benefits and is so easy to implement into your daily life. It is low maintenance and doesn't require any crazy measuring or lengthy process. This is something that anyone can do!
Making kefir with raw milk is no different from making it with conventional milk from the store. There is no learning curve if you are converting your current kefir from one kind of milk to the other. Simply swap out the type of milk you are using. I keep this on hand to make kefir smoothies to wash down my fire cider in the colder months as well as to enjoy when the weather is hot! Another easy daily homemade beverage I enjoy is an adrenal cocktail. I change it up between 3 recipes to keep it fun!
Homemade raw kefir has a lot more probiotic power than other storebought options. Because it is so easy to make and maintain, it is worth doing yourself. (Not to mention the savings that will come along with doing it yourself!) I truly believe this is the easiest home fermented food to make can maintain. It is perfect for people who are just getting started. Starting out with milk kefir and seeing the success (and that it's not so scary after all) will give you the confidence you need to get started on fermented vegetables and maybe even sourdough!
This Post May Contain Affiliate Links. Please Read Our Disclosure Policy.
Want to try other ferments out in your kitchen? Here are some to check out!
- Fermented cherry tomatoes
- Fermented lemons
- Fermented jalapeños
You can use pasteurized milk if you would like in your homemade kefir.
What are milk kefir grains?
Think of milk kefir grains as basically being a kefir starter the way you would have a sourdough starter. The grains are a starter culture made up of a combination of yeast and good bacteria.
Milk kefir grains will multiply each time you use them. Discard some grains each time they multiply. You don't need a lot! (Gift them to a loved one instead of throwing them out!)
They can last for many years if properly maintained. When you are going on vacation or you know you won't be using them for awhile for any reason, go through his process so you "feed" the grains fresh milk and leave it in the fridge. This slows down the fermentation process and will help you in your efforts to keep it going for years to come!
You can buy kefir grains online on Amazon or even from someone in your local area! Ask friends and family if they have any or if they know someone who does. The grains multiply so fast that most people are happy to give some away or sell them instead of wasting them!
How long does it take to make raw milk kefir?
This process can take 1-2 days depending on your own personal preferences!
- Day 1: Initial setup.
- Day 2: You can strain it off and use it now OR let it ferment one extra day.
- Optional Day 3: Strain it off and enjoy!
Some people do their first ferment and second ferment on the counter. I personally do my first ferment on the counter and if I do a second ferment I use the fridge. It is up to you! Try it both ways and see what you like best!

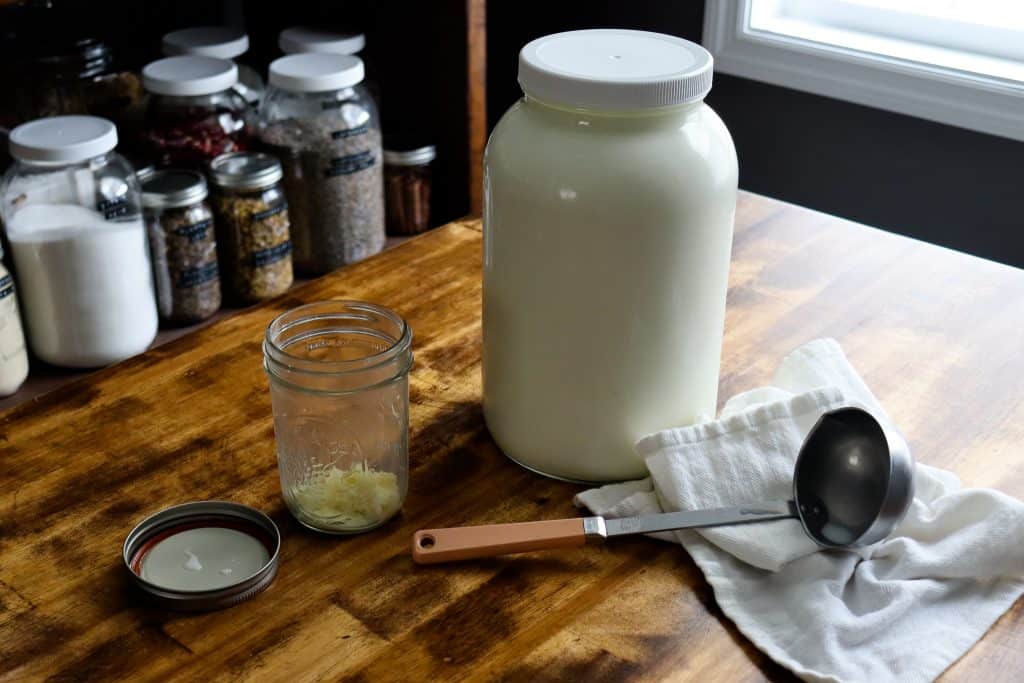
What you need to make raw milk kefir (day 1)
- Milk kefir grains.
- Raw cow's milk.
- Quart or pint size glass jar with a lid.
How to make kefir at home from raw milk (day 1)
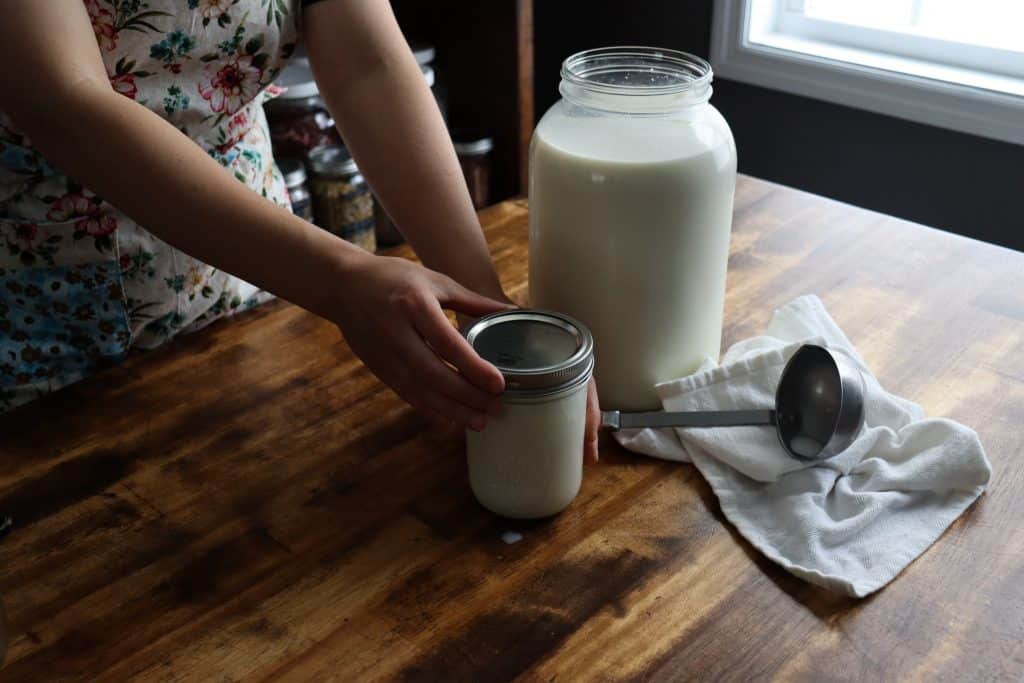
- Put your milk kefir grains in a glass jar.

2. Cover the grains with milk. Leave about a half-inch of space at the top of the jar.

3. Loosely place the lid on top of your jar. Ferment on the counter for 24 hours.
What you need for day 2 (or 3)
You can choose to let your raw milk kefir ferment for one extra day if you choose! If you decide to go an extra day I recommend putting it in the fridge for that second day for a slower ferment. If you wait an extra day, do this next step of the process the following day!
- Freshly fermented milk kefir.
- 2 glass jars with lids.
- Mesh strainer.
- Spoon.
- Funnel.

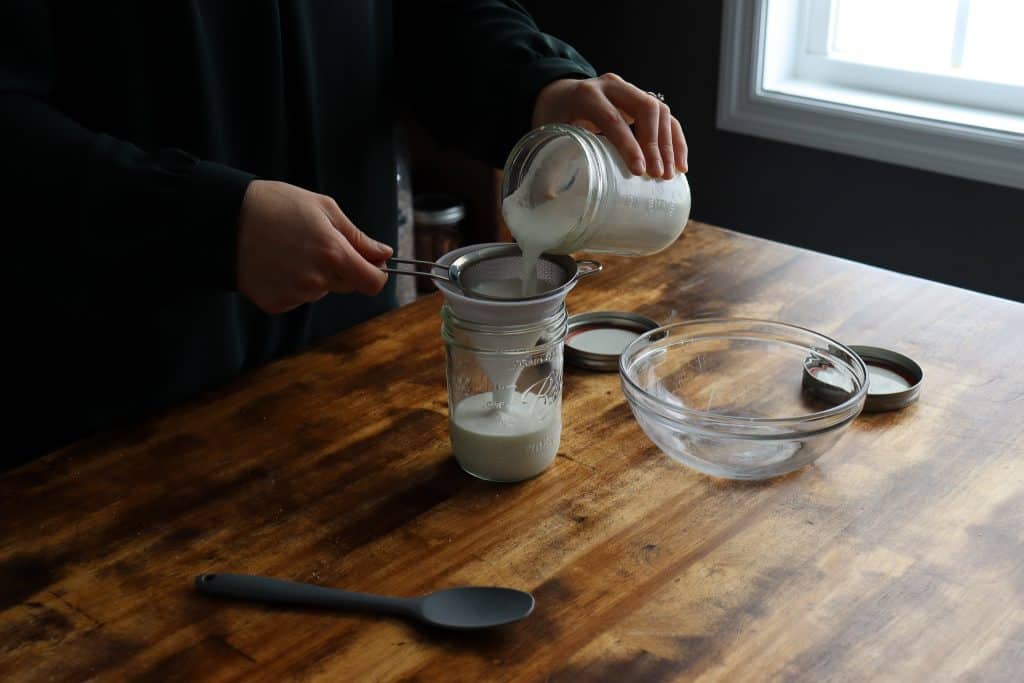
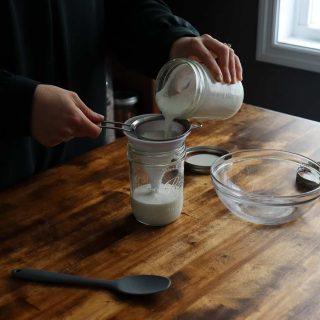
Raw Milk Kefir Day 2 (or 3) Steps
- Set up one of your jars with a funnel and mesh strainer. Carefully pour your kefir into the strainer.

2. Use your spoon to gently push out any kefir that's left in the grains.

3. Put the grains in the other jar and cover with raw milk to repeat the process.

4. Your milk kefir is ready to enjoy! Store in the fridge with a lid on.

Milk Kefir Tips
- You can choose to let your raw kefir ferment for one extra day if you choose! If you decide to go an extra day I recommend putting it in the fridge for that second day for a slower ferment.
- Discard some grains each time they multiply. You don't need a lot. Having too many can cause your milk kefir to ferment too quickly. (You can gift them to your loved ones instead of tossing them out!)
- If you are not going to be using your kefir for awhile, go through this process to "feed" the grains fresh milk and store it in the fridge.
- Some people do their first ferment and second ferment on the counter. I personally do my first ferment on the counter and if I do a second ferment I use the fridge. It is up to you! Try it both ways and see what you like best!
You may also enjoy...
- Strawberry Basil Lemonade
- Standard Fire Cider Recipe (and How to Customize it!)
- Dandelion Infused Honey
- DIY Nontoxic All-Purpose Cleaner
Shop this post
How do you like to enjoy your milk kefir?
Leave a comment below to tell us about how you use your raw kefir at home!
Raw Milk Kefir
Ingredients
- Milk kefir grains
- Raw cow's milk
Instructions
Day 1
- Put your milk kefir grains in a glass jar.
- Cover the grains with milk. Leave about a half-inch of space at the top of the jar.
- Loosely place the lid on top of your jar. Ferment on the counter for 24 hours.
- **You can choose to let your raw milk kefir ferment for one extra day if you choose! If you decide to go an extra day I recommend putting it in the fridge for that second day for a slower ferment. If you wait an extra day, do this next step of the process the following day!**
Day 2 (or 3)
- Set up one of your jars with a funnel and mesh strainer. Carefully pour your kefir into the strainer.
- Use your spoon to gently push out any kefir that's left in the grains.
- Put the grains in the other jar and cover with raw milk to repeat the process.
- Your milk kefir is ready to enjoy! Store in the fridge with a lid on.


tulipsandtwill
Courtney,
Yes! Absolutely delicious!
-Mariana
Courtney
Thanks for all the good information! I love to double ferment my kefir and then sweeten with stevia, and add cinnamon and vanilla. It tastes like a decadent treat!